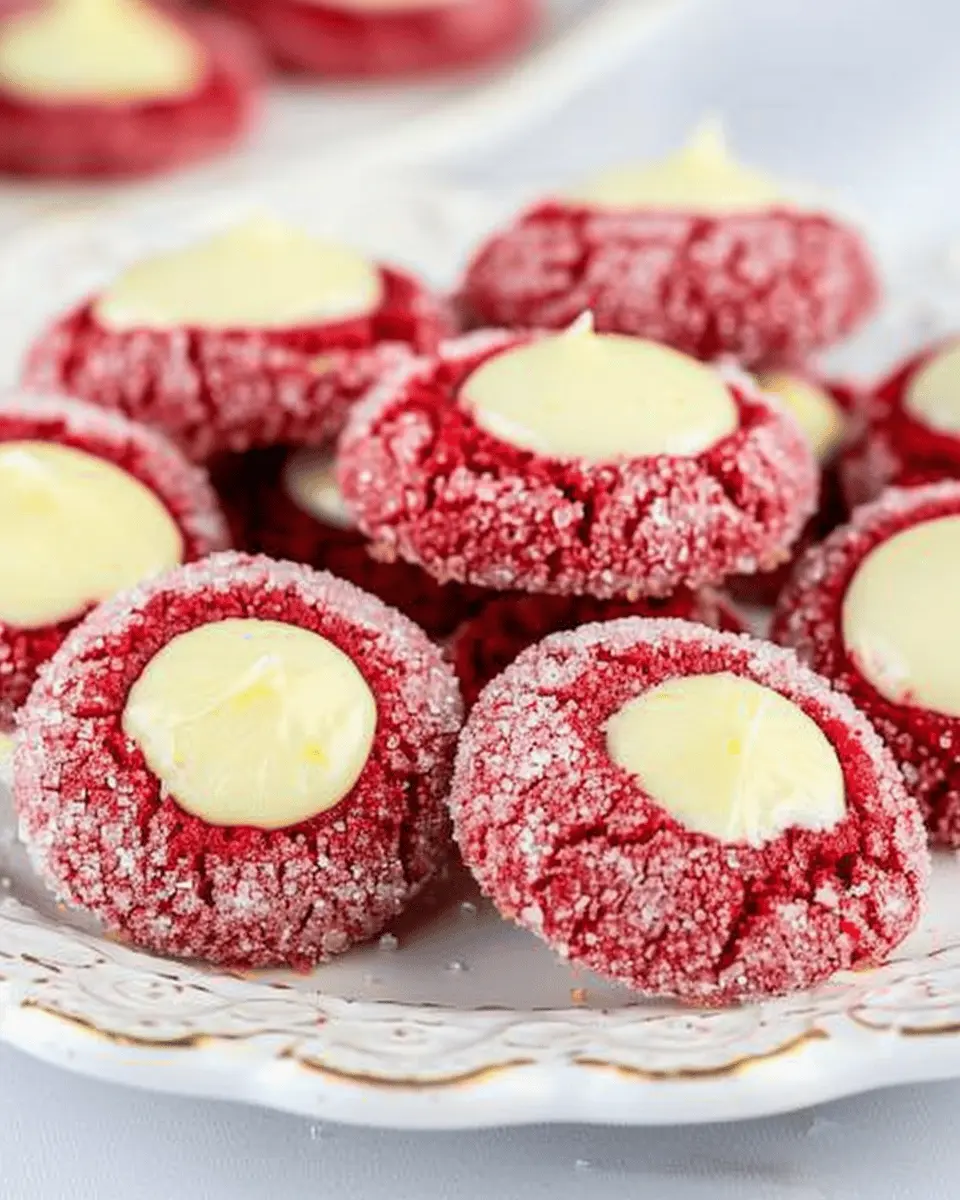
Introduction to Red Velvet Thumbprint Cookies
When you think of cookies, your mind likely wanders to classic varieties like chocolate chip or oatmeal raisin. But let’s spice things up a bit! Introducing red velvet thumbprint cookies—a delightful twist on traditional cookies that adds a burst of color and flavor to your dessert table. Imagine the luxurious texture of red velvet cake packed into a cookie, topped with a delicious cream cheese filling. By the end of this blog post, you’ll be ready to impress your family and friends with a treat that’s as beautiful as it is delicious.
A Delightful Twist on Traditional Cookies
The beauty of red velvet thumbprint cookies lies in their unique flavor profile and striking appearance. These cookies boast a soft, chewy texture, making them the perfect canvas for the smooth cream cheese center. Isn’t it amazing how one simple ingredient can elevate a dessert? Cream cheese isn’t just for spreading on bagels; it can transform your cookies into something sublime. By using ingredients you likely already have in your kitchen, such as cocoa powder and buttermilk, you can create a gorgeous and delicious treat that will have your guests talking long after the last crumb is devoured.
Did you know that red velvet cake has its roots in the Southern United States? While the history of this beloved dessert is rich and varied, it ultimately has evolved to become a staple at celebrations and events. Why not bring this tradition into your own home with these fun cookies?
Not only do they add a festive vibe to any gathering, but they’re also surprisingly simple to make. Just picture yourself baking a batch on a cozy Saturday afternoon, filling your kitchen with the aromatic scents of vanilla and cocoa. And for those of you keen on sharing your creations, consider pairing these cookies with a piping hot mug of coffee or a chilled glass of milk for the ultimate treat experience.
With countless ways to customize and elevate this recipe, these red velvet thumbprint cookies are sure to become a new favorite in your dessert repertoire. So, let’s get baking!
Ingredients for Red Velvet Thumbprint Cookies
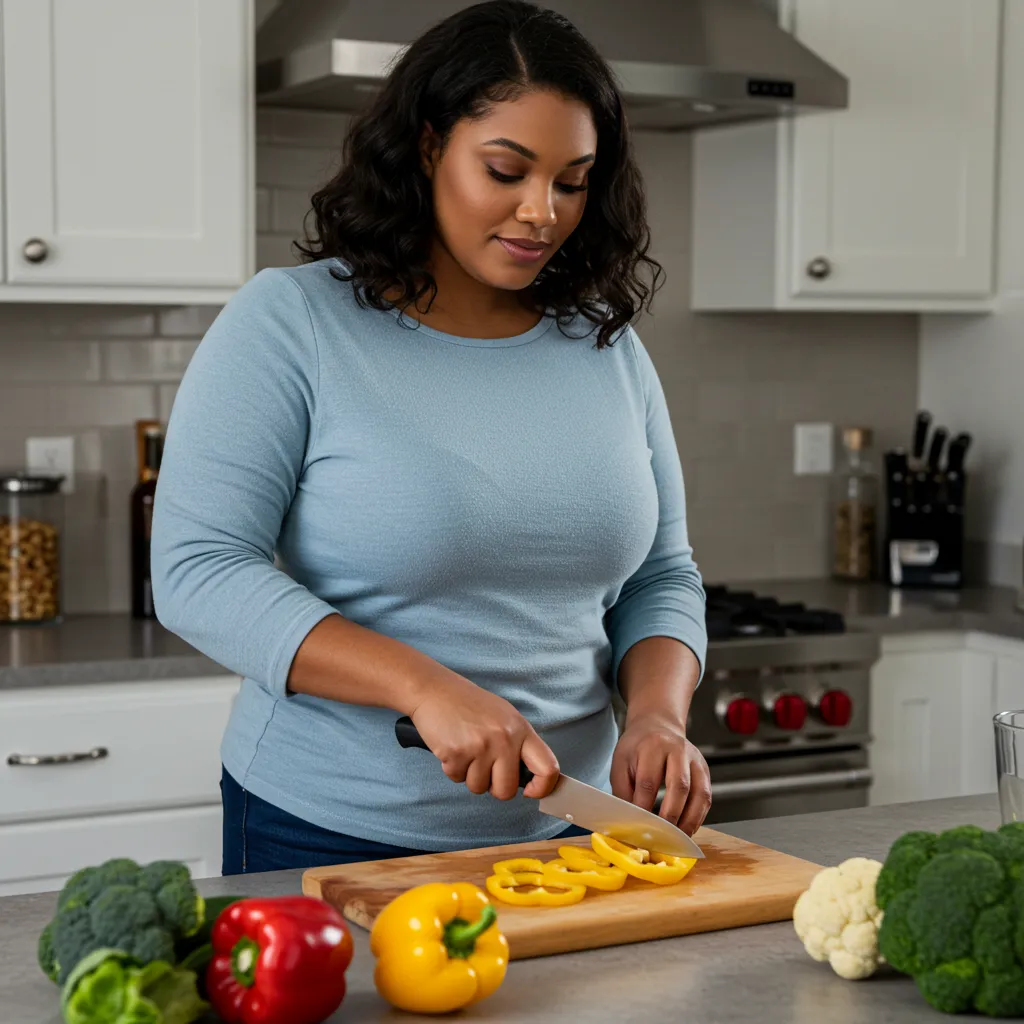
When it comes to baking, having the right ingredients can make all the difference, especially for these delightful red velvet thumbprint cookies. Let’s break down what you’ll need to create these scrumptious treats!
Essential ingredients for the cookies
To whip up the perfect batch of red velvet thumbprint cookies, gather these essentials:
- All-purpose flour: The foundation for your cookies.
- Cocoa powder: For that rich chocolate undertone.
- Baking soda and baking powder: These help your cookies rise beautifully.
- Salt: A pinch goes a long way in balancing sweetness.
- Butter: Use unsalted, softened butter for creaminess.
- Granulated sugar: To add that sweet touch.
- Brown sugar: For a hint of caramel flavor.
- Eggs: They help bind everything together.
- Vanilla extract: Enhances flavor complexity.
- Red food coloring: This gives that classic red velvet hue.
Creamy filling ingredients
The star of the show, the filling, requires a few simple ingredients:
- Cream cheese: Softened to ensure a smooth consistency.
- Powdered sugar: For sweetness and a lovely texture.
- Vanilla extract: Just a touch to elevate the flavor further.
- Lemon juice: A splash adds brightness to the creaminess.
By preparing these ingredients ahead of time, you’ll set yourself up for successful baking. For some expert tips on baking with cream cheese, check out the resources from King Arthur Baking for great insights! Happy baking!
Preparing Red Velvet Thumbprint Cookies
Red velvet thumbprint cookies combine the rich, velvety goodness of traditional red velvet cake with a delightful twist—cream cheese filling! If you’re looking to impress friends or simply satisfy your sweet tooth, these cookies are a fantastic choice. Let’s walk through how to prepare these mouthwatering treats step by step.
Gather and Prep Your Ingredients
The foundation of any great cookie is quality ingredients. For red velvet thumbprint cookies, you’ll need the following:
-
For the cookies:
-
2 ¾ cups all-purpose flour
-
1 tablespoon cocoa powder
-
1 teaspoon baking soda
-
½ teaspoon salt
-
1 cup unsalted butter, softened
-
1 cup granulated sugar
-
1 large egg
-
1 tablespoon red food coloring
-
1 teaspoon vanilla extract
-
For the cream cheese filling:
-
8 oz cream cheese, softened
-
½ cup powdered sugar
-
1 teaspoon vanilla extract
Before you begin, make sure all ingredients are at room temperature, especially the cream cheese. This will ensure a smooth filling. Also, consider measuring your flour using the scoop and level method to avoid dense cookies. You can find more detailed ingredient guides on trusted cooking websites like Serious Eats.
Create the Cookie Dough
Once your ingredients are ready, it’s time to bring them together. Start by:
- In a bowl, whisk together the flour, cocoa powder, baking soda, and salt. Set aside.
- In a larger mixing bowl, beat the softened butter and granulated sugar together until they become light and fluffy—around 3-5 minutes.
- Add in the egg, food coloring, and vanilla extract, mixing until combined.
- Gradually add the dry ingredients from your first bowl into the wet ingredients, mixing until just combined. Overmixing can make your cookies tough, and we want them perfectly tender.
This cookie dough is rich and vibrant in color, which is part of what makes red velvet thumbprint cookies so appealing.
Chill the Dough
Now that your dough is mixed, you’ll want to chill it for at least 30 minutes. Chilling helps to firm up the dough, making it easier to handle and improving the texture of your cookies.
- Wrap the dough in plastic wrap or cover it with a clean kitchen towel.
- While you wait, you might want to clean up your workspace or prepare your baking sheets!
Bake the Cookies
Preheat your oven to 350°F (175°C). Line your baking sheets with parchment paper while your oven warms up.
- Once chilled, scoop out tablespoon-sized portions of dough and roll them into balls.
- Place them on the prepared baking sheets, ensuring there’s enough space to allow for spreading.
- Use your thumb (or the back of a spoon) to create an indentation in the center of each ball.
Bake for about 10-12 minutes. They should look set and slightly puffed. Let them cool on the baking sheets for a few minutes before transferring them to a wire rack.
Make the Cream Cheese Filling
While your cookies are cooling, it’s time to whip up the cream cheese filling. It’s simple:
- In a medium bowl, beat the softened cream cheese with powdered sugar and vanilla extract until it’s creamy and smooth.
- If you want a little twist, consider adding a touch of lemon zest to brighten the flavors!
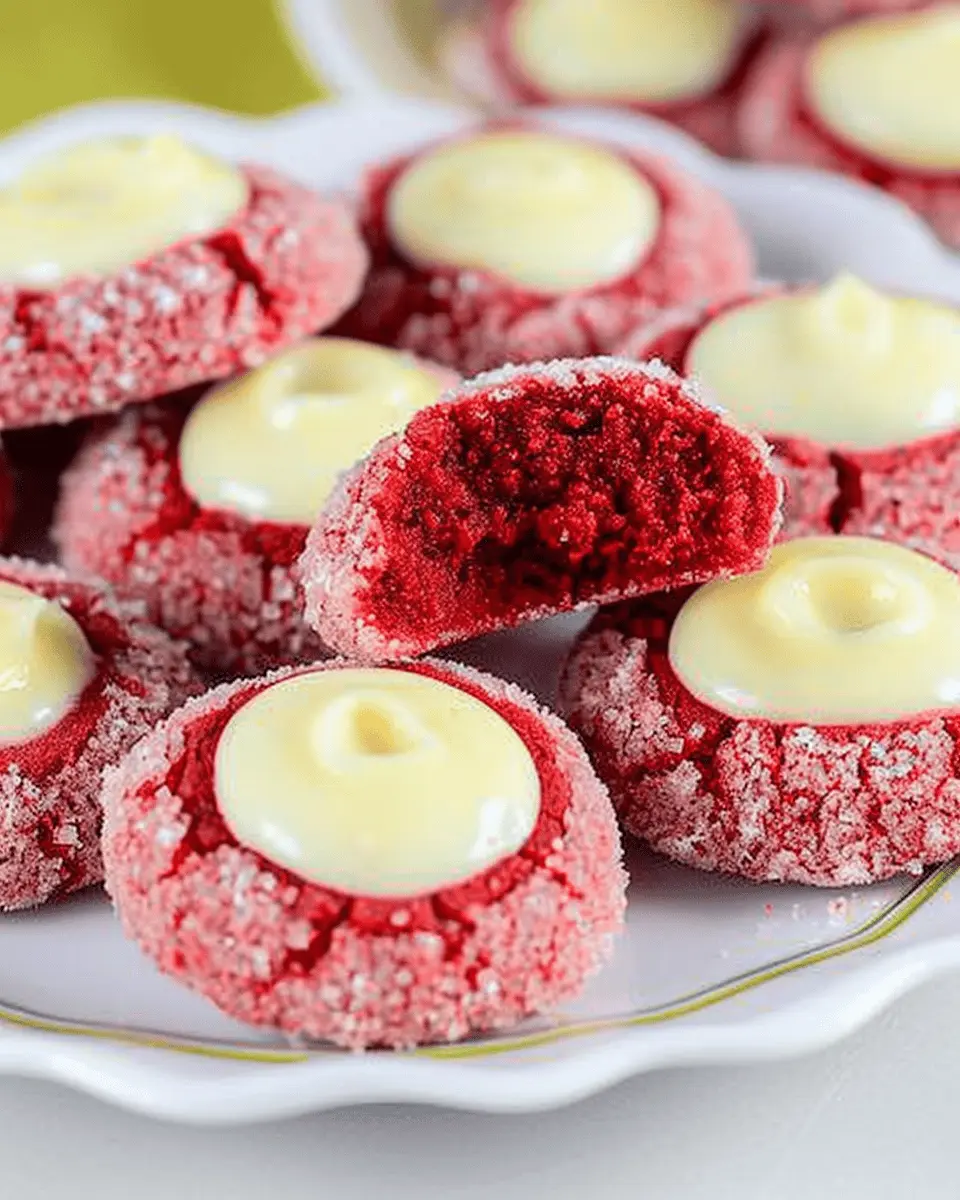
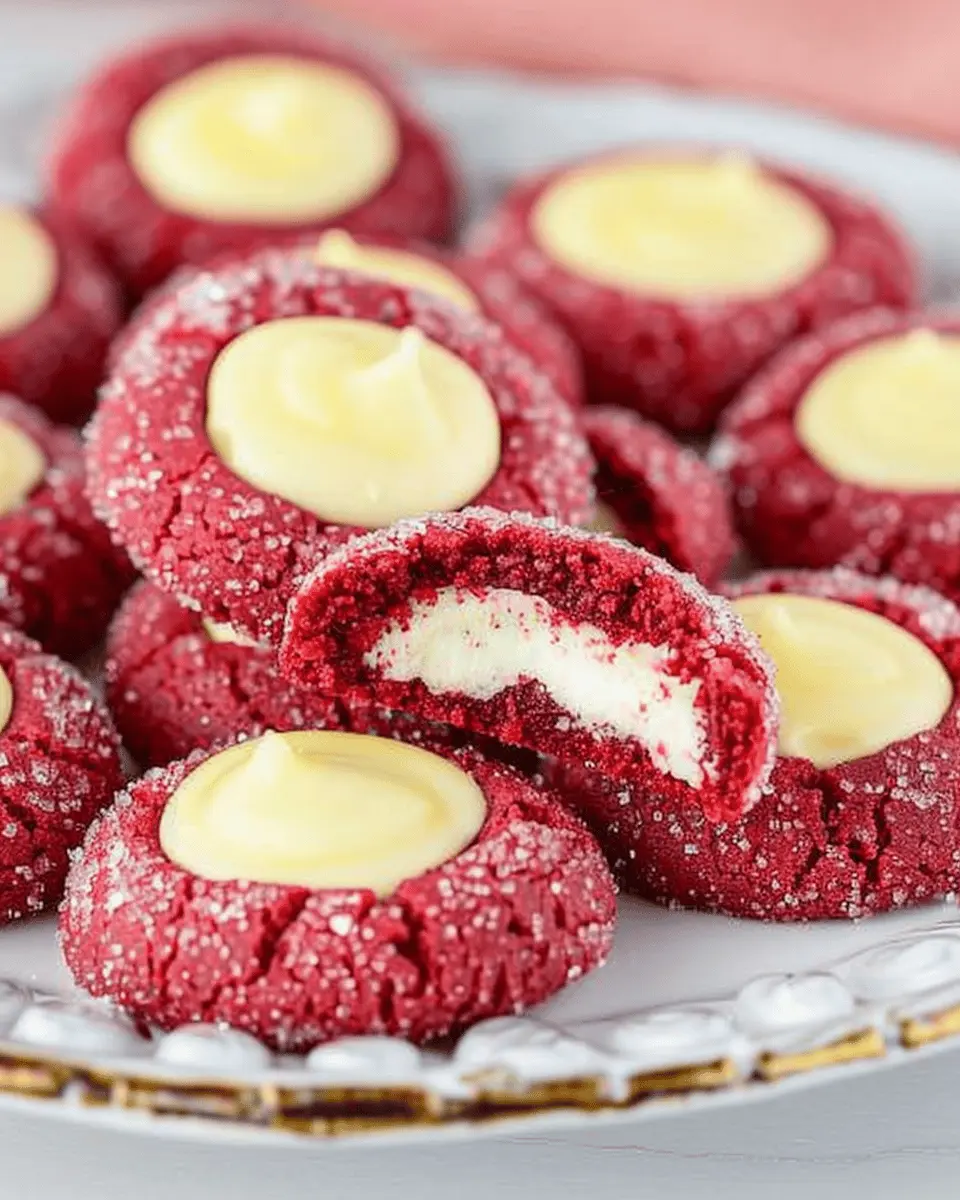
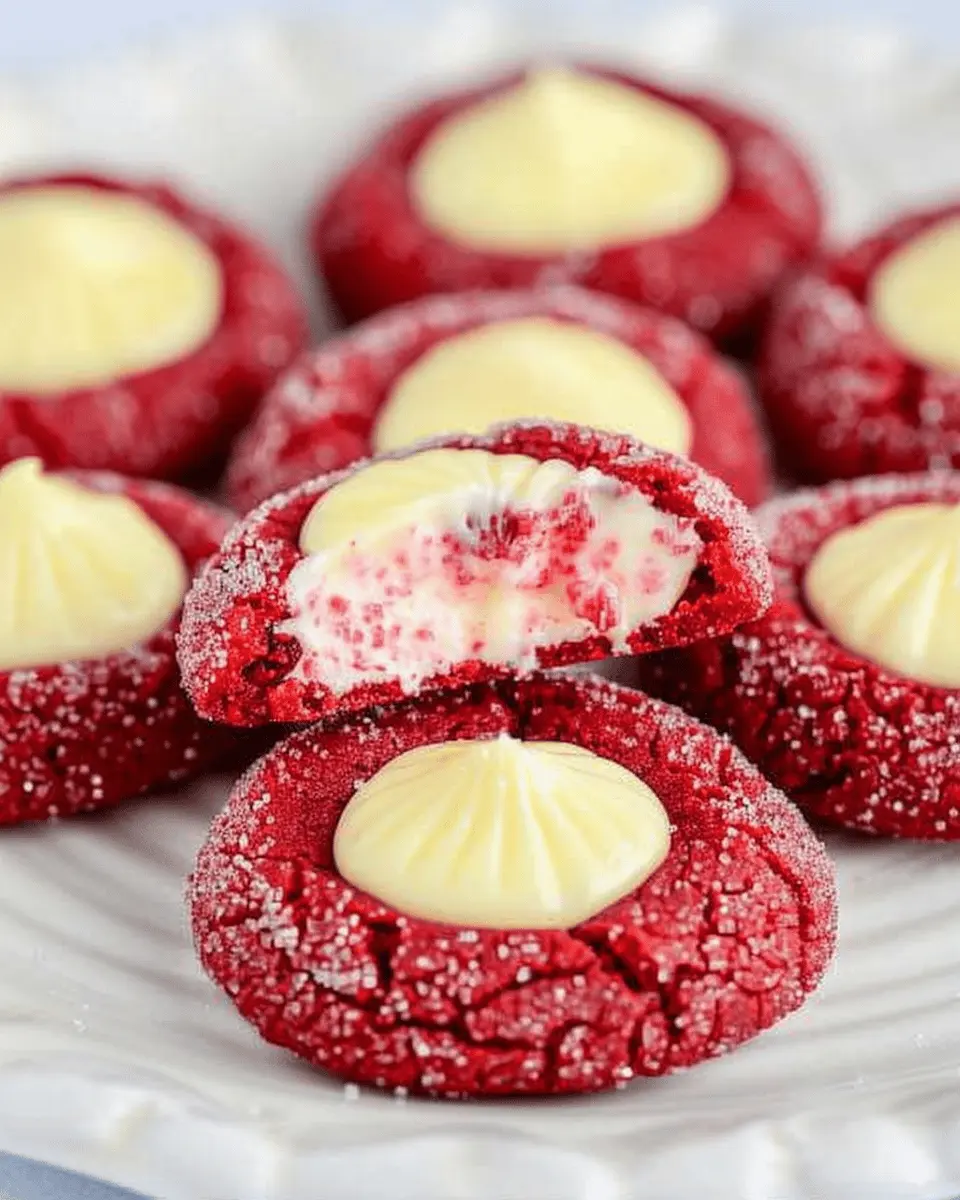
Add the Filling to the Cookies
Once the cookies have cooled completely, it’s filling time. Using a small piping bag or a spoon, fill the thumbprint indentation in each cookie with generous amounts of that delicious cream cheese filling.
Voila! Your red velvet thumbprint cookies with cream cheese are ready to be enjoyed or beautifully displayed for guests. Whether for a party or your own cozy snack time, these cookies will surely be a hit. Consider pairing them with a warm cup of coffee or tea—perfect for winding down after a busy day!
Variations on Red Velvet Thumbprint Cookies
Classic Red Velvet with a Twist
If you’re a fan of the traditional red velvet cake, why not give your red velvet thumbprint cookies a delightful upgrade? One simple change is to incorporate chopped nuts like walnuts or pecans into the cookie dough. This adds not only a pleasant crunch but also a rich flavor that beautifully complements the sweet cream cheese filling. You could even drizzle a little chocolate on top if you’re feeling adventurous—it’s a great way to elevate your cookie game!
Another twist involves swapping out the standard cream cheese filling for a spiced cream cheese frosting, adding layers of warmth and sweetness. For even more flavor, try incorporating a touch of maple syrup or vanilla extract into your cream mixture. These small changes can transform your cookies and make them a standout treat for your next gathering.
Red Velvet Thumbprint Bar Cookies
If you’re short on time or just looking for something more convenience-friendly, consider making red velvet thumbprint bar cookies. Instead of forming individual cookies, spread the dough in a baking dish and create equally sized thumbprint shapes. Bake until set, then fill the indents with your beloved cream cheese mixture.
To keep things interesting, you can experiment with flavored fillings, such as caramel or fruit preserves. Not only will this approach save you prep time, but it also allows for an array of flavors in each slab. Who wouldn’t love that?
These variations make it easy to tailor your baking experience, whether you’re in a time crunch or just feeling creative. For more tips on baking and cookie variations, check out Food52 or Serious Eats for inspiration!
Baking Tips for Red Velvet Thumbprint Cookies
Perfecting the Cookie Texture
When baking red velvet thumbprint cookies, achieving the perfect texture is key. For a soft and chewy cookie, make sure not to overmix your dough after adding the dry ingredients—just mix until combined. It’s also essential to chill your dough for at least 30 minutes before baking; this helps the cookies maintain their shape while creating that delightful softness. If you love a bit of crunch, consider sprinkling a little coarse sugar on top before baking for added texture!
Troubleshooting Common Issues
Even experienced bakers can face hiccups! If your red velvet thumbprint cookies are spreading too much, check if your butter is too soft; it should be at room temperature, not melted. If they’re too dry, you might need to slightly reduce the flour next time. For those tricky thumbprints, use a round measuring spoon to make an even indentation that holds the cream cheese filling beautifully.
For more tips, check out this baking guide which offers additional insights into perfecting various cookie recipes!
Serving suggestions for Red Velvet Thumbprint Cookies
Pairing with Beverages
When it comes to enjoying your red velvet thumbprint cookies, the right beverage can elevate the experience. A cozy cup of brewed tea—think Earl Grey or a rich Chai—complements the cookies’ richness beautifully. For a caffeine kick, a frothy latte or a smooth cappuccino can pair well with the cream cheese center, enhancing the cookies’ flavor. If you’re looking for non-caffeinated options, opt for a refreshing glass of cold milk. The subtle sweetness of the cookies pairs harmoniously with these drinks, creating a delightful balance.
Presenting Them for Gatherings
Planning a gathering? Consider showcasing your red velvet thumbprint cookies on a decorative platter, perhaps dusted with a light sprinkle of powdered sugar for visual appeal. Arrange them alongside a centerpiece of seasonal fruits or colorful flowers for a stylish touch. Want to amp up the ambiance? Serve them with a small bowl of cream cheese frosting for your guests to dip into, making for an interactive dessert experience. For more styling tips, check out resources like The Kitchn for inspiration.
With these serving suggestions, your cookies will not only taste amazing but also impress at any event!
Time breakdown for Red Velvet Thumbprint Cookies
Preparation time
Getting your kitchen ready for these red velvet thumbprint cookies takes about 15-20 minutes. This includes gathering ingredients like flour, sugar, and the essential cream cheese for the filling. Don’t forget to preheat your oven to simplify your baking process!
Baking time
The treats need around 10-12 minutes in the oven. It’s the perfect time to clean up or maybe enjoy a quick coffee break while your cookies transform into delightful bites of joy.
Total time
In total, you’re looking at roughly 30-35 minutes from start to finish. This means you’ll have scrumptious red velvet thumbprint cookies ready to impress in no time!
For a complete guide, visit King Arthur Baking for tips on achieving the perfect texture.
Nutritional information for Red Velvet Thumbprint Cookies
Calories per cookie
Each red velvet thumbprint cookie brings approximately 90 calories to your treat time. If you’re looking for a delicious yet balanced sweet option, these cookies may hit the spot without blowing your daily calorie count.
Key nutritional highlights
When it comes to nutrition, these cookies offer more than just flavor. Here are some highlights:
- Fat Content: Typically, each cookie contains around 4 grams of fat, mostly from butter and cream cheese.
- Protein: With about 1 gram of protein per cookie, they provide just enough to help curb your sweet tooth.
- Carbohydrates: Each cookie boasts around 12 grams of carbs, perfect for a quick pick-me-up snack.
For anyone keen on watching their sugar intake, it’s worth noting that the cream cheese filling gives a rich flavor without an overload of sweetness. Interested in more health-conscious dessert options? Check out sources like the U.S. Department of Agriculture for nutritional insights!
FAQs about Red Velvet Thumbprint Cookies
Can I make these cookies in advance?
Absolutely! Red velvet thumbprint cookies can be made ahead of time, which is perfect for busy schedules or pre-holiday baking. You can prepare the cookie dough and refrigerate it for up to 3 days. Alternatively, you can bake the cookies, let them cool completely, and then store them in an airtight container for about a week at room temperature. Planning for parties? Freeze unbaked dough balls for up to three months! Just remember to thaw them in the fridge before baking.
What can I use instead of cream cheese?
If you’re not a fan of cream cheese or need a dairy-free option, don’t worry! You can swap cream cheese with several alternatives. Try Greek yogurt for a tangy flavor or vegan cream cheese for a dairy-free solution. You can also use buttercream frosting if you’re looking for a sweeter filling. Each option adds a unique twist to your red velvet thumbprint cookies, so feel free to experiment!
How should I store leftover cookies?
Storing leftover red velvet thumbprint cookies is easy. Just place them in an airtight container to keep them fresh. For extra protection against staleness, consider layering them with parchment paper to prevent sticking. Ideally, enjoy them within a week for the best taste and texture. If you’ve made them in large batches, you can freeze them for a longer shelf life. Just thaw at room temperature when you’re ready to indulge again!
For more tips and inspiration, check out resources from the Joy of Baking or the Food Network.
Conclusion on Red Velvet Thumbprint Cookies
Celebrate delicious homemade treats! Red velvet thumbprint cookies are a delightful way to bring joy to any occasion, whether it’s a cozy night in or a festive gathering with friends. The vibrant color and rich flavor make these cookies a standout choice, especially when paired with luscious cream cheese filling.
As you embark on your baking journey, remember: the joy of creating something tasty from scratch is just as rewarding as the treat itself. So gather your ingredients and enjoy this fun culinary adventure! For more inspiration, check out sources like Bon Appétit and Serious Eats for tips on perfecting your cookie game. Happy baking!
PrintRed Velvet Thumbprint Cookies: Indulgent Cream Cheese Delight

Delight in the rich flavors of these Red Velvet Thumbprint Cookies filled with creamy frosting!
- Prep Time: 30 minutes
- Cook Time: 12 minutes
- Total Time: 42 minutes
- Yield: 24 cookies 1x
- Category: Dessert
- Method: Baking
- Cuisine: American
- Diet: Vegetarian
Ingredients
- 2 cups all-purpose flour
- 1 cup unsweetened cocoa powder
- 1 teaspoon baking powder
- 1/2 teaspoon baking soda
- 1/4 teaspoon salt
- 1 cup unsalted butter, softened
- 1 cup granulated sugar
- 1 large egg
- 1 tablespoon red food coloring
- 1 teaspoon vanilla extract
- 8 ounces cream cheese, softened
- 2 cups powdered sugar
Instructions
- Preheat the oven to 350°F (175°C).
- In a bowl, mix together flour, cocoa powder, baking powder, baking soda, and salt.
- In another bowl, beat the butter and granulated sugar until light and fluffy.
- Add in egg, red food coloring, and vanilla extract; mix until combined.
- Gradually add the dry ingredients to the wet mixture and mix until just combined.
- Shape the dough into balls and place them on a baking sheet.
- Use your thumb to create an indentation in the center of each ball.
- Bake for 10-12 minutes or until set.
- Let cookies cool completely before filling.
- For the filling, beat the cream cheese and powdered sugar until smooth and creamy.
- Spoon the cream cheese filling into the center of each cookie.
Notes
- Chill the dough for easier handling.
- Try different food coloring to create unique variations.
Nutrition
- Serving Size: 1 cookie
- Calories: 150
- Sugar: 10g
- Sodium: 100mg
- Fat: 7g
- Saturated Fat: 4g
- Unsaturated Fat: 2g
- Trans Fat: 0g
- Carbohydrates: 20g
- Fiber: 1g
- Protein: 2g
- Cholesterol: 30mg
Keywords: Red Velvet Cookies, Thumbprint Cookies, Cream Cheese Cookies