Introduction to Pumpkin Crisp
What is Pumpkin Crisp and why you’ll love it?
Have you ever felt the need for a cozy dessert that’s perfect for fall? Enter pumpkin crisp, a delightful dessert that combines the earthy sweetness of pumpkin with a crunchy topping that creates a satisfying contrast in every bite. Imagine a luscious pumpkin filling, spiced to perfection, topped with a golden brown, buttery streusel—sounds tempting, right?
The beauty of pumpkin crisp lies in its versatility. It’s not just a seasonal treat; it can easily become a year-round favorite. Whether you’re hosting friends for Thanksgiving, attending a potluck, or simply craving something comforting at home, this dish fits the bill beautifully. Plus, it’s incredibly easy to whip up! You don’t need to be a master chef to impress your guests or to enjoy a slice with a casual cup of coffee on a quiet afternoon.
Another aspect to love about pumpkin crisp is its nutritional benefits. Pumpkin is loaded with vitamins, especially vitamin A, and is low in calories, making it a healthier indulgence. When combined with oats, nuts, and a sweetener, you get a wholesome dessert that doesn’t just satisfy your sweet tooth but also provides some essential nutrients. For those who are curious about the health benefits of pumpkin, Healthline has some great insights.
While pumpkin crisp is often associated with holidays, this scrumptious dessert has a unique way of sneaking its way into your heart (and your kitchen) all year long. The aroma of spices like cinnamon and nutmeg that wafts through your home while it bakes is enough to make anyone feel warm and happy.
So, why not treat yourself and your loved ones to a slice (or two) of pumpkin crisp? It’s a delightful way to bring a taste of fall into any season, and it will undoubtedly become a cherished recipe in your collection! Stay tuned for the full recipe to bring this scrumptious dessert to life.
Ingredients for Pumpkin Crisp
When it comes to making a delightful pumpkin crisp, you want to gather the freshest and most flavorful ingredients. Let’s break it down into two essential layers: the pumpkin pie filling and that irresistible cinnamon streusel topping.
Main Ingredients for the Pumpkin Pie Layer
- Pumpkin puree: Use canned or fresh for a rich pumpkin flavor.
- Sugar: A combination of granulated and brown sugar adds depth.
- Eggs: These will help bind everything together.
- Heavy cream: Adds creaminess to your filling.
- Pumpkin pie spice: A must-have for that classic fall flavor. Alternatively, you can create your own mix with cinnamon, nutmeg, and ginger.
- Salt: Just a pinch enhances the sweetness.
Ingredients for the Cinnamon Streusel Topping
- Rolled oats: For added texture.
- Flour: All-purpose works best.
- Brown sugar: It provides a caramel-like sweetness.
- Butter: Use cold, cubed butter for a crumbly topping.
- Cinnamon: The star spice here, giving warmth to your pumpkin crisp.
- Chopped nuts: Optional, but walnuts or pecans add a nice crunch.
With these ingredients, you’re on your way to creating a deliciously comforting dessert that’s perfect for fall gatherings. If you’re new to baking, don’t worry—this is a straightforward recipe to follow! For more insights on food preparation, check out this guide on proper ingredient storage. Happy baking!
Preparing Pumpkin Crisp
When the cozy season rolls around, Pumpkin Crisp becomes a sweet staple at gatherings, family dinners, and even cozy nights in. This delightful dessert is layered with a smooth pumpkin filling and topped with a crunchy streusel topping. Let’s dive in and go through the steps together to create this autumn-inspired treat that everyone will love!
Gather Your Ingredients
Before we get started, let’s collect everything you’ll need for your Pumpkin Crisp. Here’s a quick list to help you in the kitchen:
For the pumpkin layer:
- 2 cups canned pumpkin puree (ensure it’s 100% pumpkin)
- 1 cup sweetened condensed milk
- 1 large egg
- 1 teaspoon vanilla extract
- 2 teaspoons pumpkin pie spice
For the streusel topping:
- 1 cup rolled oats
- 1 cup all-purpose flour
- ¾ cup brown sugar, packed
- ½ cup cold unsalted butter, cubed
- 1 teaspoon ground cinnamon
- 1 teaspoon salt
These ingredients come together to create a beautiful balance of flavors and textures. Make sure to preheat your oven to 350°F (175°C) as you organize your kitchen!
Prepare the Pumpkin Layer
Let’s whip up that delicious pumpkin layer, which is the star of our Pumpkin Crisp. Start by taking a large mixing bowl and combine the pumpkin puree, sweetened condensed milk, egg, vanilla extract, and pumpkin pie spice.
- Tip: Use a whisk to blend everything smoothly, ensuring there are no lumps. This will make sure your filling is creamy and velvety when baked. For recipes like this, fresh ingredients usually yield the best results—they pack more flavor!
Once the mixture is smooth, pour it into a greased 9×13 inch baking dish. This is where the magic happens as it bakes and fills your kitchen with that classic, autumn aroma.
Create the Delicious Streusel Topping
Now, let’s get to the crunchy part—okay, maybe it’s time we stop talking about it and just start making it! In another bowl, combine your rolled oats, all-purpose flour, brown sugar, ground cinnamon, and salt.
- Mix these dry ingredients well, then add in the cubed butter. Using your fingers, incorporate the butter until the mixture resembles coarse crumbs. This is where the streusel’s charm comes from; a little effort goes a long way here!
Assemble and Bake the Pumpkin Crisp
With your layers ready, you can now assemble your Pumpkin Crisp. First, evenly pour the streusel mixture over the pumpkin layer in the baking dish. This is crucial; a good even spread ensures that every bite is just as delicious as the next.
Once that’s done, pop it in your preheated oven and let it bake for about 30-35 minutes. You’ll want to keep an eye on it around the 25-minute mark—your nose will be your best friend here when the sweet aroma starts wafting through the air!
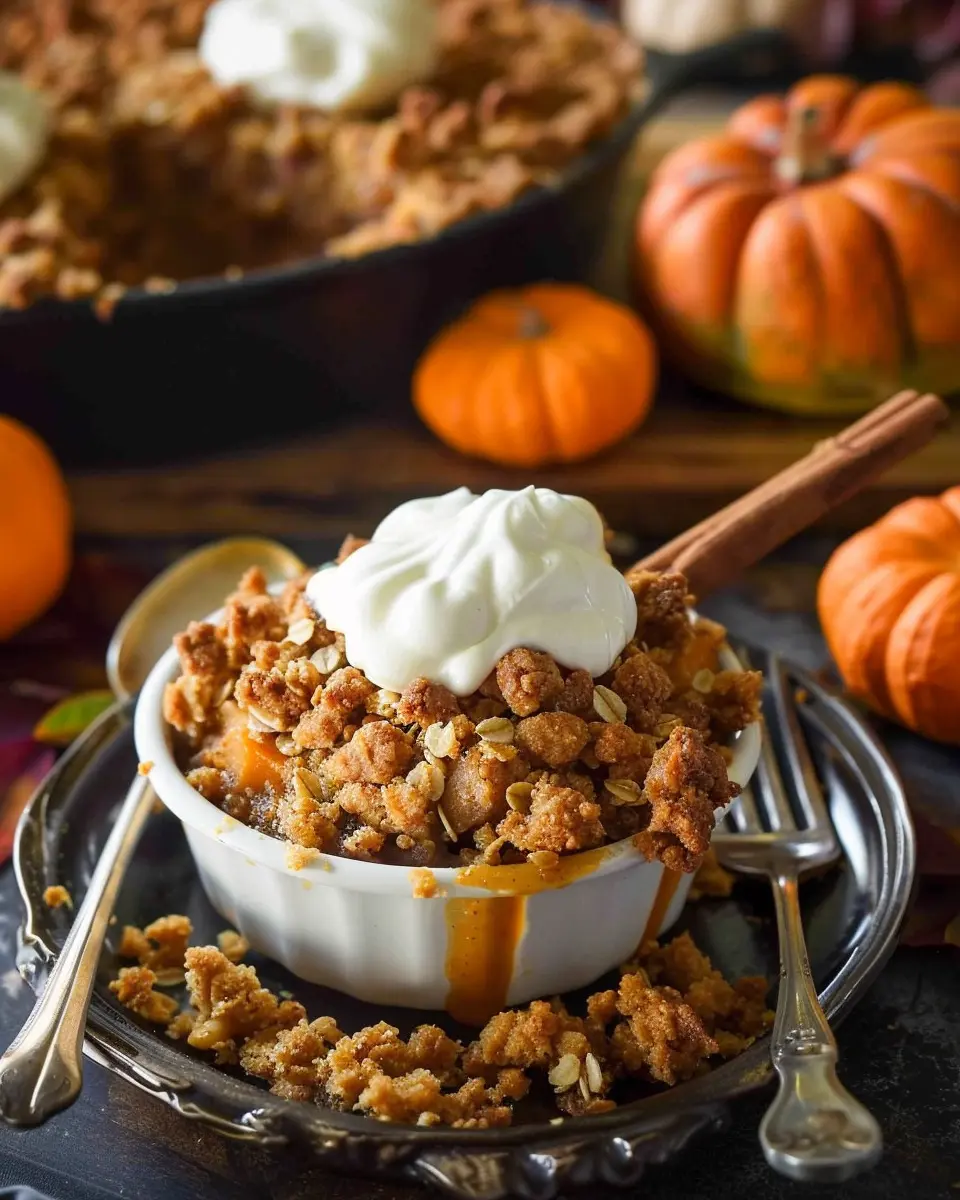
Cool and Serve Your Pumpkin Crisp
Patience is key here, as tempting as it is to dive right in. Once your Pumpkin Crisp is out of the oven, let it cool for about 10-15 minutes. This cooling period allows the layers to set a bit and makes serving easier.
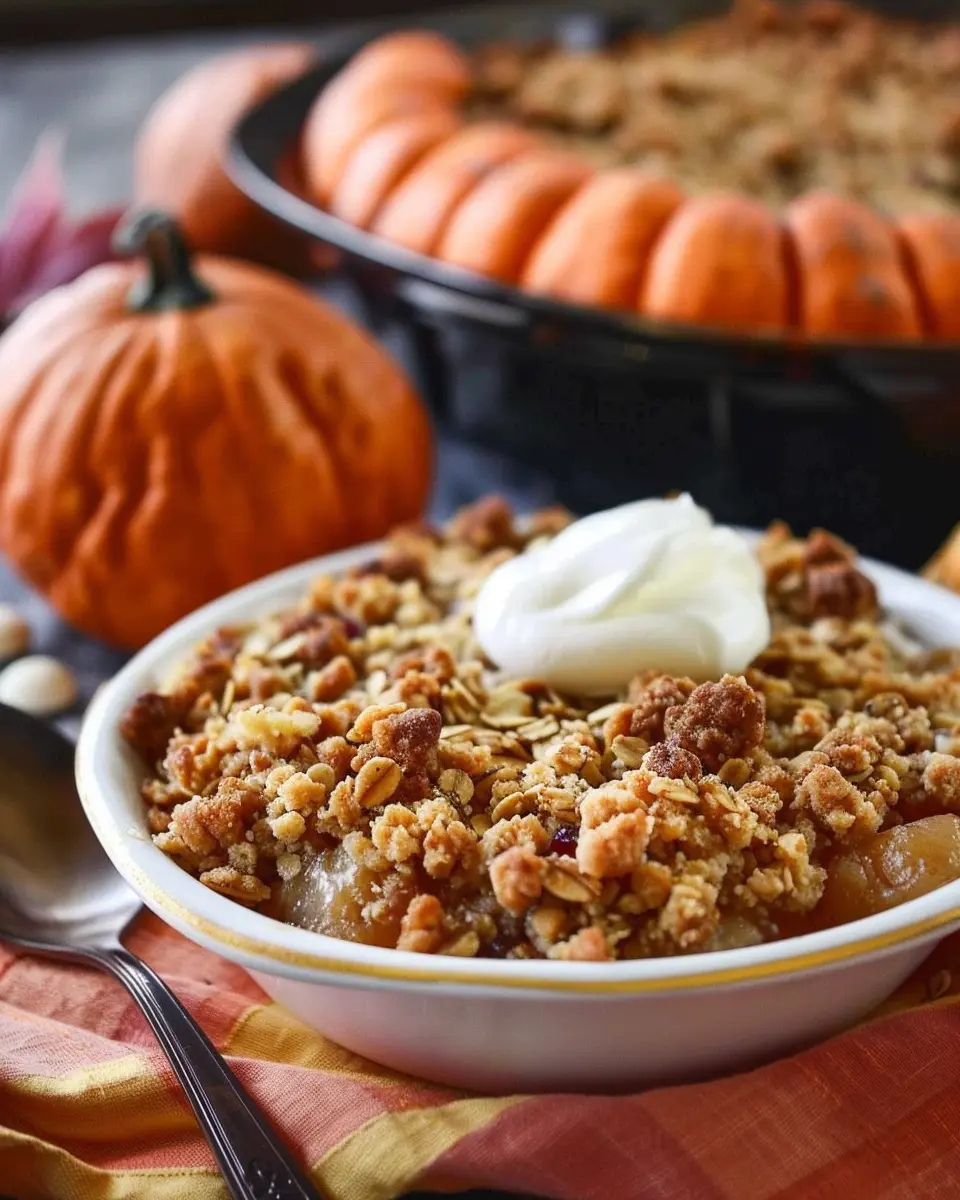
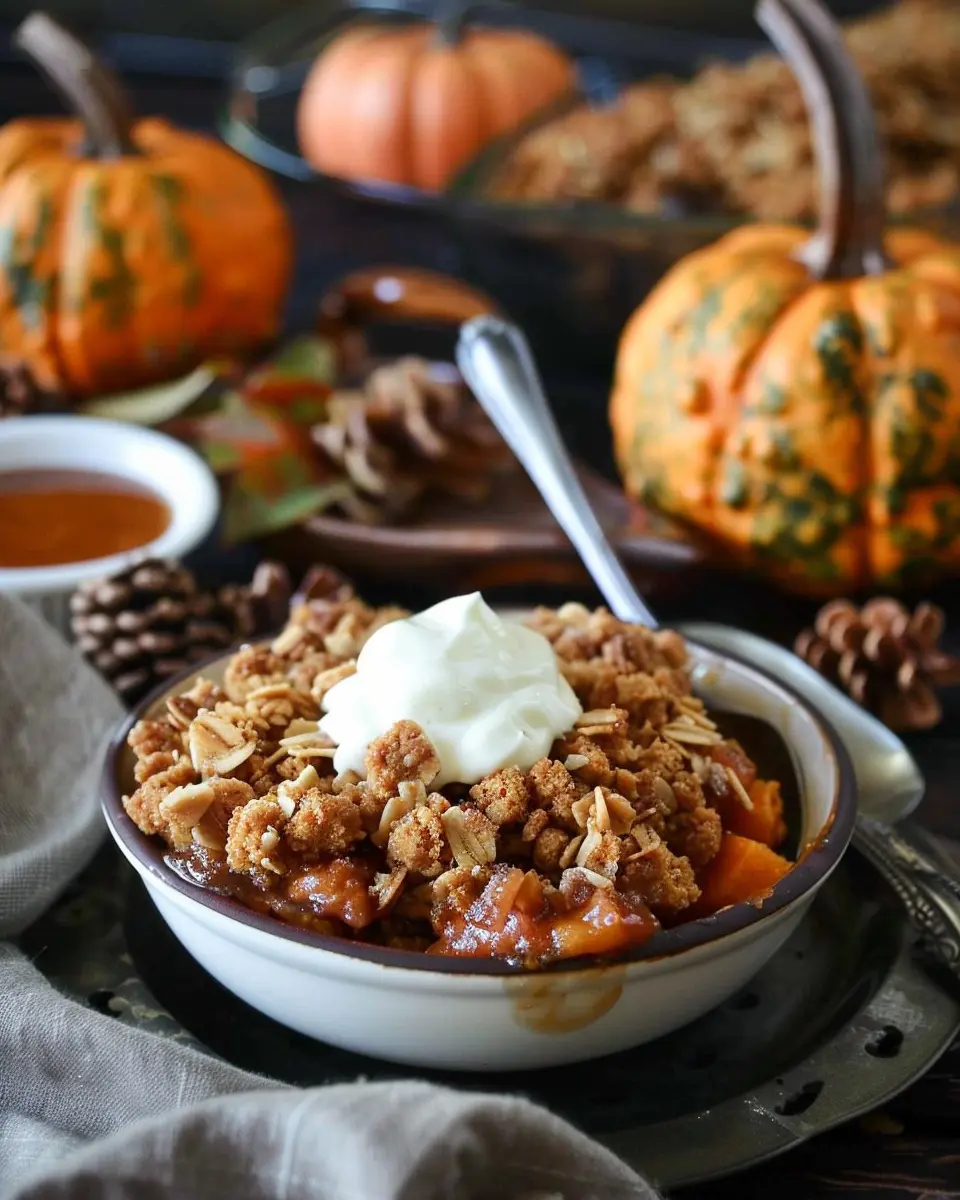
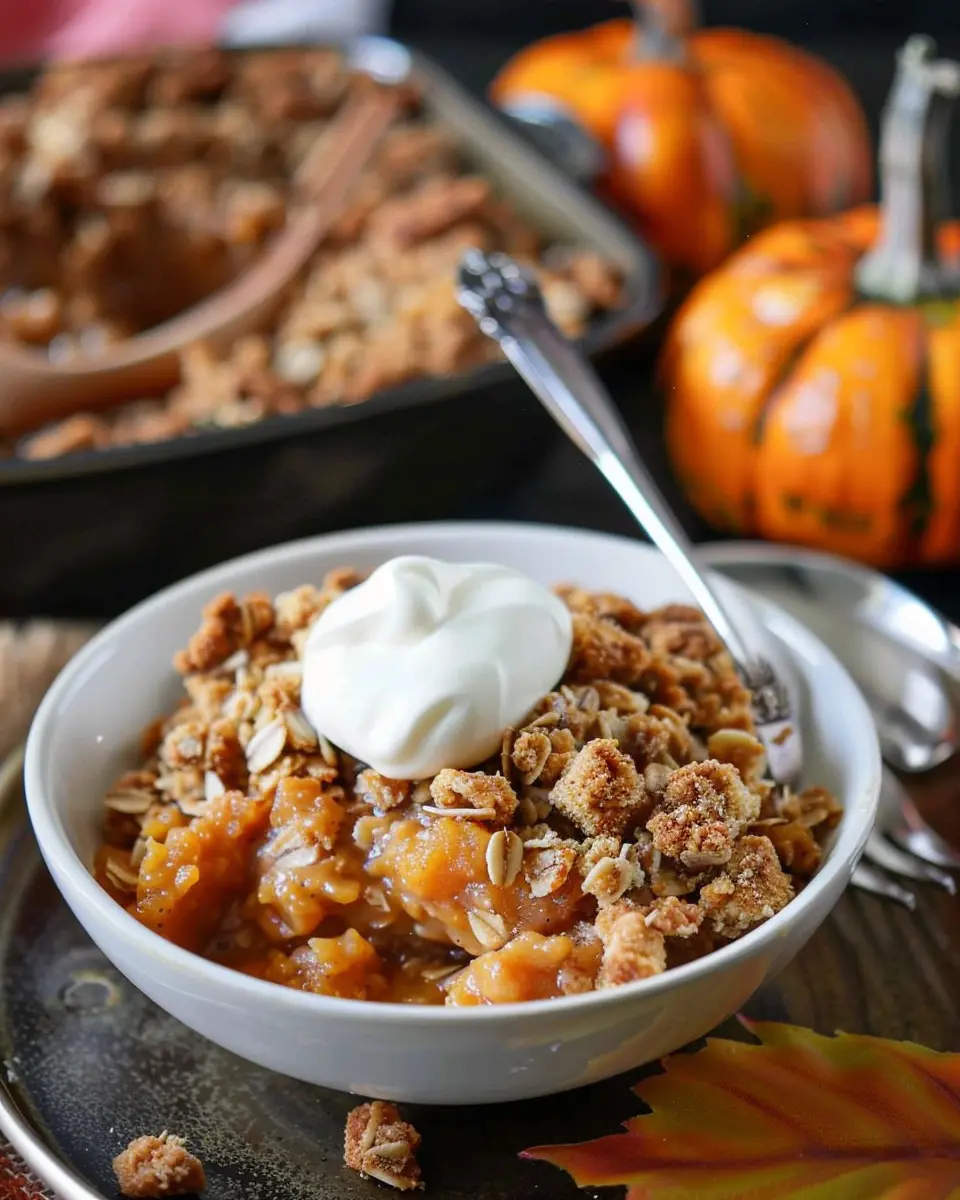
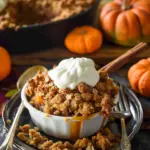
When you’re ready, scoop out generous portions and serve it warm. For added indulgence, consider a dollop of whipped cream or a scoop of vanilla ice cream on top. What’s better than a warm dessert that brings together the rich flavors of fall?
Before you take that first bite, remember: good food brings people together. So, whether you’re hosting friends for game night or enjoying a quiet evening, your Pumpkin Crisp is sure to be the highlight of the table. Enjoy, and don’t forget to share your baking adventures!
Variations on Pumpkin Crisp
Pumpkin Crisp with Nuts or Oatmeal
If you want to add a little crunch to your pumpkin crisp, consider adding nuts or oatmeal to the topping. Walnuts, pecans, or even hazelnuts can complement the warm spices in the pumpkin filling beautifully.
- Nuts: Chop them roughly to mix into your crisp topping. Just a half-cup will do the trick, and you’ll get a lovely nutty flavor that plays well against the creamy pumpkin.
- Oatmeal: For a heartier texture, substitute some of the flour in your crisp with rolled oats. Aim for a 1:1 ratio—one cup of oats for every cup of flour. Not only does this add taste, but it also provides added fiber.
Gluten-Free Pumpkin Crisp Option
For those who need a gluten-free option, crafting a delicious pumpkin crisp is entirely doable! Choose certified gluten-free oats or almond flour as your base for the topping.
- Almond Flour: It gives a rich flavor while maintaining a nice crunch. Use a 1:1 swap for regular flour, and brighten it up with some cinnamon and nutmeg.
- Coconut Flour: This can also be used, but remember it’s more absorbent. You may only need half the amount, so adjust accordingly.
Remember, gluten-free does not mean compromising on taste. Your guests might not even realize they’re enjoying a pumpkin crisp that caters to their dietary needs.
For more tips on gluten-free baking, you can check out resources from the Gluten Intolerance Group.
Experimenting with these variations will make your pumpkin crisp memorable and delightful for everyone at the table. Happy baking!
Cooking Tips and Notes for Pumpkin Crisp
Storage Tips for Leftovers
After enjoying your delicious pumpkin crisp, you might wonder how to keep the leftovers fresh. Store any uneaten portions in an airtight container in the refrigerator for up to four days. If you want to save it for longer, consider freezing it! Wrap individual servings tightly in plastic wrap, then place them in a freezer-safe container. You’ll be able to enjoy your tasty treat for up to three months. Just remember to reheat gently in the oven or microwave for the best texture!
Make-Ahead Instructions
Want to impress your guests without the last-minute rush? You can make pumpkin crisp ahead of time! Prepare the pumpkin filling and crunchy topping separately, and store them in the fridge for up to 24 hours. When you’re ready to bake, simply layer them in your dish and pop it in the oven. This not only saves time but also allows those mouthwatering flavors to meld together beautifully.
For more ideas on how to elevate your pumpkin crisp experience, check out Serious Eats for expert advice!
Serving Suggestions for Pumpkin Crisp
Best Pairings for Your Pumpkin Crisp
The delightful pumpkin crisp is a versatile dessert that pairs beautifully with many flavors. For a cozy touch, how about serving it warm with a scoop of creamy vanilla ice cream? The melty ice cream contrasts wonderfully with the crispy topping. Alternatively, consider a dollop of whipped cream or a sprinkle of toasted pecans to add that extra crunch.
Try enjoying your pumpkin crisp alongside a steaming cup of chai or coffee for a complete autumnal experience. These beverages complement the warming spices in the crisp beautifully, making for a perfect cozy evening.
Creative Serving Ideas
Get a little creative with presentation! Try serving your pumpkin crisp in individual ramekins for a cute and trendy look. Add a drizzle of caramel sauce on top for that added wow factor. You can also layer it in a mason jar with layers of yogurt for a delightful breakfast treat, combining sweetness and protein.
For more ideas on how to serve or enhance your pumpkin crisp, check out Food Network’s entertaining tips. This can inspire a culinary adventure that truly celebrates the essence of pumpkin and fall flavors.
Time breakdown for Pumpkin Crisp
Prep time
The prep time for your delectable pumpkin crisp is about 20 minutes. This gives you enough time to gather all the ingredients—like canned pumpkin, oats, and spices—and mix them up with love.
Cooking time
Once prepped, you’ll need to bake your creation for 30 to 35 minutes. Set your oven to 350°F (175°C) and let that delightful aroma fill your kitchen as it cooks to perfection.
Total time
In total, you’re looking at a smooth 50 to 55 minutes from start to finish. It’s a fantastic way to spend an afternoon in the kitchen, and just think of the nervous excitement when your guests take their first bites! If you’re curious about another delicious dessert option, check out this Pumpkin Custard recipe.
Not only is this time commitment minimal for such a scrumptious result, but it also leaves plenty of room for enjoying the little moments while you wait.
Nutritional facts for Pumpkin Crisp
Calories and macronutrients
When it comes to Pumpkin Crisp, this delightful dessert packs a flavorful punch without breaking the calorie bank. In a typical serving, you can expect around 200-250 calories, making it a delicious choice for your sweet cravings. The macronutrient breakdown looks something like this:
- Carbohydrates: 35g
- Protein: 3g
- Fat: 10g
This makes Pumpkin Crisp a well-rounded treat if you’re mindful of your nutritional intake. Plus, pumpkin is rich in vitamins A and C, and fiber, providing added health benefits while indulging in dessert!
Tips for making it healthier
Looking to enhance your Pumpkin Crisp experience? Here are a few simple swaps to lighten it up:
- Use whole grain oats instead of regular oats for more fiber.
- Replace sugar with natural sweeteners like honey or maple syrup—these not only sweeten but offer a hint of flavor as well.
- Experiment with healthy fats; choose coconut oil or unsweetened applesauce instead of butter to reduce saturated fat.
These minor adjustments won’t just enhance the flavor but also make Pumpkin Crisp a bit more guilt-free! For more details on the benefits of sweeteners, check out this resource on healthy sugar alternatives.
By keeping these tips in mind, you’re sure to whip up a Pumpkin Crisp that’s not only scrumptious but also aligns well with health-conscious choices. Enjoy your baking!
FAQs about Pumpkin Crisp
Can I substitute the heavy cream?
Absolutely! If you’re looking to lighten up your pumpkin crisp, you can use alternatives like half-and-half or a dairy-free option such as coconut cream or almond milk. Keep in mind that these substitutes may subtly alter the flavor and texture, but they can still yield a delicious result. If you’re avoiding dairy altogether, look for creamy plant-based products that maintain a similar consistency to heavy cream.
How do I know when the Pumpkin Crisp is done?
Determining the doneness of your pumpkin crisp is fairly straightforward. Look for a golden-brown top with a bubbly filling around the edges. An inserted knife or toothpick should come out clean when the filling is set. Additionally, the edges may slightly pull away from the pan when it’s time to take it out of the oven. If you’re unsure, it’s always better to keep it a tad longer than underbaked!
Can I freeze Pumpkin Crisp for later?
Yes, you can! Freezing pumpkin crisp is a great way to enjoy this delicious dessert at a later time. Just ensure it cools completely before wrapping it tightly in plastic wrap and aluminum foil or placing it in an airtight freezer-safe container. It can last up to three months in the freezer. When you’re ready to enjoy, thaw it in the fridge overnight and reheat in the oven until warmed through. Perfect for those last-minute dessert cravings!
If you have any other questions, feel free to explore more pumpkin dessert options or check out tips on freezing baked goods for optimal results.
Conclusion on Pumpkin Crisp
Why Pumpkin Crisp is a must-try this fall
As the days grow shorter and the air turns crisp, there’s no better way to embrace the flavors of autumn than with a delightful pumpkin crisp. This dessert combines the warm, comforting essence of pumpkin with a crunchy topping that creates the perfect balance of textures.
Its easy preparation makes it a favorite for gatherings—imagine sharing this cozy treat with friends or family over a warm cup of apple cider. Plus, pumpkin is not just delicious; it’s packed with nutrients, making your fall feasting a bit healthier!
Ready to elevate your fall dessert game? Try your hand at this mouthwatering pumpkin crisp recipe and savor every bite of the season’s magic. For more ideas on incorporating pumpkin into your meals, check out this guide from Food52 for inspiration.
PrintPumpkin Crisp: The Best Cozy Dessert for Fall Enjoyment
A delightful and comforting pumpkin crisp recipe perfect for fall.
- Prep Time: 15 minutes
- Cook Time: 35 minutes
- Total Time: 50 minutes
- Yield: 8 servings 1x
- Category: Dessert
- Method: Baking
- Cuisine: American
- Diet: Vegetarian
Ingredients
- 1 can pumpkin puree
- 1 cup brown sugar
- 1 teaspoon cinnamon
- ½ teaspoon nutmeg
- 1 teaspoon vanilla extract
- 2 cups oats
- 1 cup flour
- ½ cup butter, melted
- 1 cup chopped nuts
Instructions
- Preheat the oven to 350°F (175°C).
- In a bowl, mix pumpkin puree, brown sugar, cinnamon, nutmeg, and vanilla extract.
- Spread the pumpkin mixture evenly in a baking dish.
- In another bowl, combine oats, flour, melted butter, and nuts.
- Spread the oat mixture over the pumpkin layer.
- Bake for 30-35 minutes until golden brown.
- Let it cool before serving.
Notes
- Serve warm with whipped cream or ice cream for added indulgence.
- Can be made ahead and reheated.
Nutrition
- Serving Size: 1 square
- Calories: 300
- Sugar: 20g
- Sodium: 150mg
- Fat: 12g
- Saturated Fat: 7g
- Unsaturated Fat: 3g
- Trans Fat: 0g
- Carbohydrates: 45g
- Fiber: 4g
- Protein: 5g
- Cholesterol: 30mg
Keywords: Pumpkin Crisp