Introduction to Mini Cheesecake Cups
If you’re a dessert lover, you’ve likely experienced the joy of cheesecake—its rich, creamy texture is hard to resist. Yet, there’s something even more delightful and practical: mini cheesecake cups. These bite-sized treats not only satisfy your sweet tooth but also offer a plethora of advantages that larger cheesecakes simply can’t match.
Why Mini Cheesecakes Are a Game-Changer for Dessert Lovers
Mini cheesecake cups are revolutionizing the way we think about desserts. For one, their charming size makes them perfect for portion control. When was the last time you felt guilty after indulging in a mini dessert? With these dainty delights, you can enjoy a morsel of sweetness without overindulging. Studies even show that serving smaller portions can reduce calorie intake, making it easier to savor flavors without the extra guilt (source: Harvard Health).
Another reason to love these little cups is their versatility. You can experiment with flavors ranging from classic vanilla to adventurous options like salted caramel or matcha. Got a specific dietary need? Mini cheesecakes can be easily adapted for gluten-free or vegan diets, offering everyone a chance to enjoy them. Plus, they’re not just tasty; their attractive presentation is a surefire way to impress your friends at gatherings. Imagine serving a colorful array of mini cheesecake cups at your next party—the vibrant colors and mini portions are as visually appealing as they are delicious.
These cups also shine in terms of convenience. They can be made ahead of time and stored in the fridge, making them ideal for busy professionals who want something sweet ready to go after a long day. Plus, because they’re individually portioned, there’s minimal mess involved, allowing you to enjoy them anywhere—from picnics to movie nights at home.
Whether you’re whipping them up for a special occasion or just treating yourself after a hectic week, mini cheesecake cups present a delicious solution. They blend the richness of traditional cheesecakes with modern-day practicality, ensuring that dessert can be a guilt-free indulgence. Ready to dive into this delightful world? Let’s get cooking!
Ingredients for Mini Cheesecake Cups
Creating delicious mini cheesecake cups at home is easier than you think! With the right ingredients, you can whip up a delightful treat that’s perfect for any occasion. Here’s a breakdown of what you’ll need.
Essential Ingredients for the Crust
The foundation of your mini cheesecake cups starts with a crumbly crust. You’ll need:
- Graham cracker crumbs: About 1 cup for that classic flavor.
- Granulated sugar: Just 2 tablespoons to add sweetness.
- Melted butter: Approximately 6 tablespoons to bind everything together.
Finding great graham crackers is key; consider local bakeries or high-quality brands for the best flavor!
Key Ingredients for the Cheesecake Filling
Now, onto the luscious filling that makes these mini cheesecake cups irresistible:
- Cream cheese: Two 8-ounce packages, softened for smooth mixing.
- Granulated sugar: Another half cup for just the right sweetness.
- Sour cream: 1 cup to add creaminess.
- Vanilla extract: 1 teaspoon for that lovely aroma.
- Eggs: Two, for that perfect creamy texture.
Be sure to use high-quality cream cheese for an authentic cheesecake experience!
Topping Options to Personalize Your Dessert
The fun part? Toppings! Here are some ideas to elevate your mini cheesecake cups:
- Fresh berries: Strawberries, blueberries, or raspberries are all excellent.
- Chocolate ganache: Drizzle some over the top for a rich finish.
- Caramel sauce: A sweet touch that pairs beautifully with the tangy filling.
- Crushed nuts: Add a delightful crunch; pecans or almonds work well.
Feel free to experiment with your favorite flavors, from citrus zest to chocolate shavings. The possibilities are endless! For additional inspiration, check out this article on cheesecake toppings for more creative ideas.
Now you’re all set to make your mini cheesecakes a hit! Happy baking!
Step-by-step Preparation for Mini Cheesecake Cups
Creating mini cheesecake cups is not only a delicious endeavor but also a surprisingly simple one. Whether you’re prepping for a party or just indulging in a weekend treat, these delightful bites will surely impress. Let’s walk through the straightforward steps to achieve cheesecake perfection!
Preheat the oven and prepare the muffin pan
To kick things off, you’ll want to preheat your oven to 325°F (160°C). This is essential for ensuring your cheesecakes bake evenly and develop that rich, creamy texture we all crave. While the oven warms up, grab a standard muffin pan and line it with cupcake liners. This step not only makes for easy removal of your mini cheesecake cups but also adds a lovely aesthetic when you’re ready to serve.
For those who prefer more of a ‘no-liner’ approach, you can lightly grease the muffin pan with cooking spray. Whichever route you choose, making sure your pan is prepped is vital for flawless mini cheesecakes.
Make the graham cracker crust
A cheesecake isn’t complete without its crust! For our mini version, you’ll need about 1 ½ cups of crushed graham crackers, mixed with ½ cup of melted butter and ¼ cup of sugar. Combine these ingredients until they resemble wet sand.
Push the mixture firmly into the bottom of each muffin liner, using a small spoon or your fingers, to create a solid base. Aim for an even layer that will hold up when you pour in the cheesecake filling.
Prepare the creamy cheesecake filling
Now for the best part — the cheesecake filling! In a large mixing bowl, blend 16 ounces of cream cheese until it’s perfectly smooth. At this point, you’ll want to add ½ cup of sugar, 2 large eggs (one at a time, mixing well after each addition), and a teaspoon of vanilla extract.
For an extra zing, consider mixing in a couple of tablespoons of sour cream or Greek yogurt. This will elevate your mini cheesecake cups with an added creaminess!
If you’re feeling adventurous, you can also customize your filling. Want a hint of lemon? Add a teaspoon of lemon juice and zest for brightness.
Fill the muffin cups with cheesecake batter
Carefully scoop the cheesecake filling into each muffin cup, leaving about a quarter inch of space at the top. This allows room for the cheesecakes to rise slightly as they bake. To keep the filling uniform, you can use a cookie scoop or a measuring cup.
Pro tip: If you want to add some fun flavors, consider dropping a spoonful of fruit purée—or even a dollop of Nutella—into the center of each cup before they go in the oven. Swirl it in gently with a toothpick for a surprise flavor kick!
Bake the mini cheesecakes
Once your muffin pan is filled, place it in the preheated oven. Bake for about 20-25 minutes, or until the edges look set, and the centers have a slight jiggle. This indicates that they’re perfectly baked!
It’s essential to keep an eye on them, as ovens can vary. A quick tip: If you see the tops starting to brown too much, you can gently cover them with aluminum foil.
Chill before serving
After baking, remove the pan from the oven and let cool for 10-15 minutes. Then, transfer the mini cheesecake cups to the refrigerator to chill for at least 2-3 hours, but overnight is even better — it allows the flavors to meld together fantastically!
When you’re ready to serve, top them with your favorite fruits, chocolate drizzle, or even a sprinkle of nuts. The options are endless! Not only do these mini cheesecakes taste amazing, but they’re also visually stunning when beautifully garnished.
And there you have it! With just a few simple steps, you can whip up a batch of delicious mini cheesecake cups. Why not share your creations on social media or with friends? Happy baking! For more delicious ideas, check out sources like The Cheesecake Factory or AllRecipes.
Variations on Mini Cheesecake Cups
Creating mini cheesecake cups can be a delightful culinary adventure! Here are some variations to inspire your next baking session.
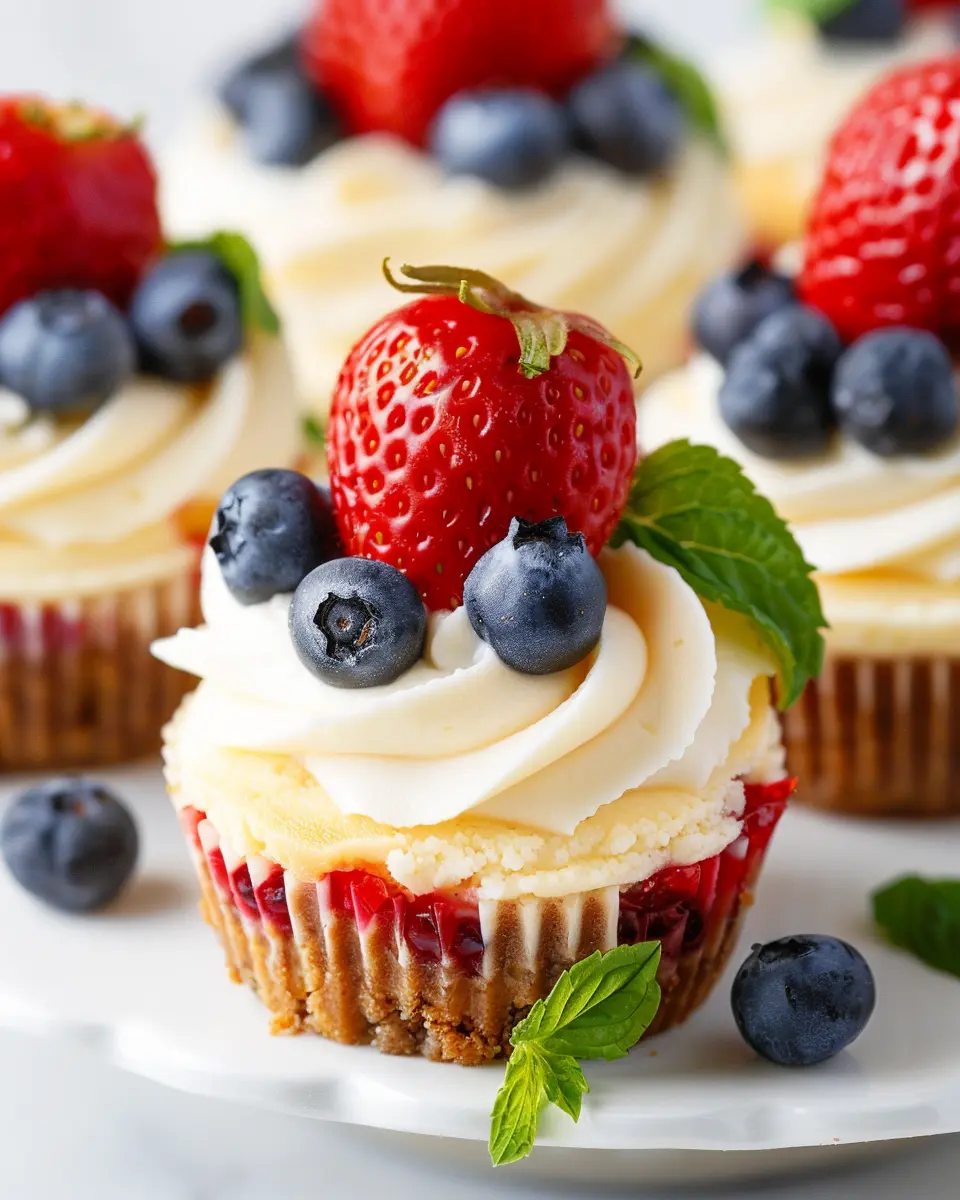
Fruit-topped Mini Cheesecakes
Fresh fruit can brighten up your mini cheesecake cups in a unique way. Consider topping your cheesecake with:
- Strawberries: Sliced and drizzled with balsamic glaze for a fresh twist.
- Blueberries: A handful of blueberries mixed into the batter or as a topping offers a tart-sweet contrast.
- Peach Compote: Cook down peaches with a touch of sugar for a sweet, homemade topping.
- Raspberry Sauce: Blend raspberries and a little sugar to create a delicious sauce that adds a pop of color and flavor.
Fruits not only add vibrant color, but they also contribute natural sweetness without the need for added sugars.
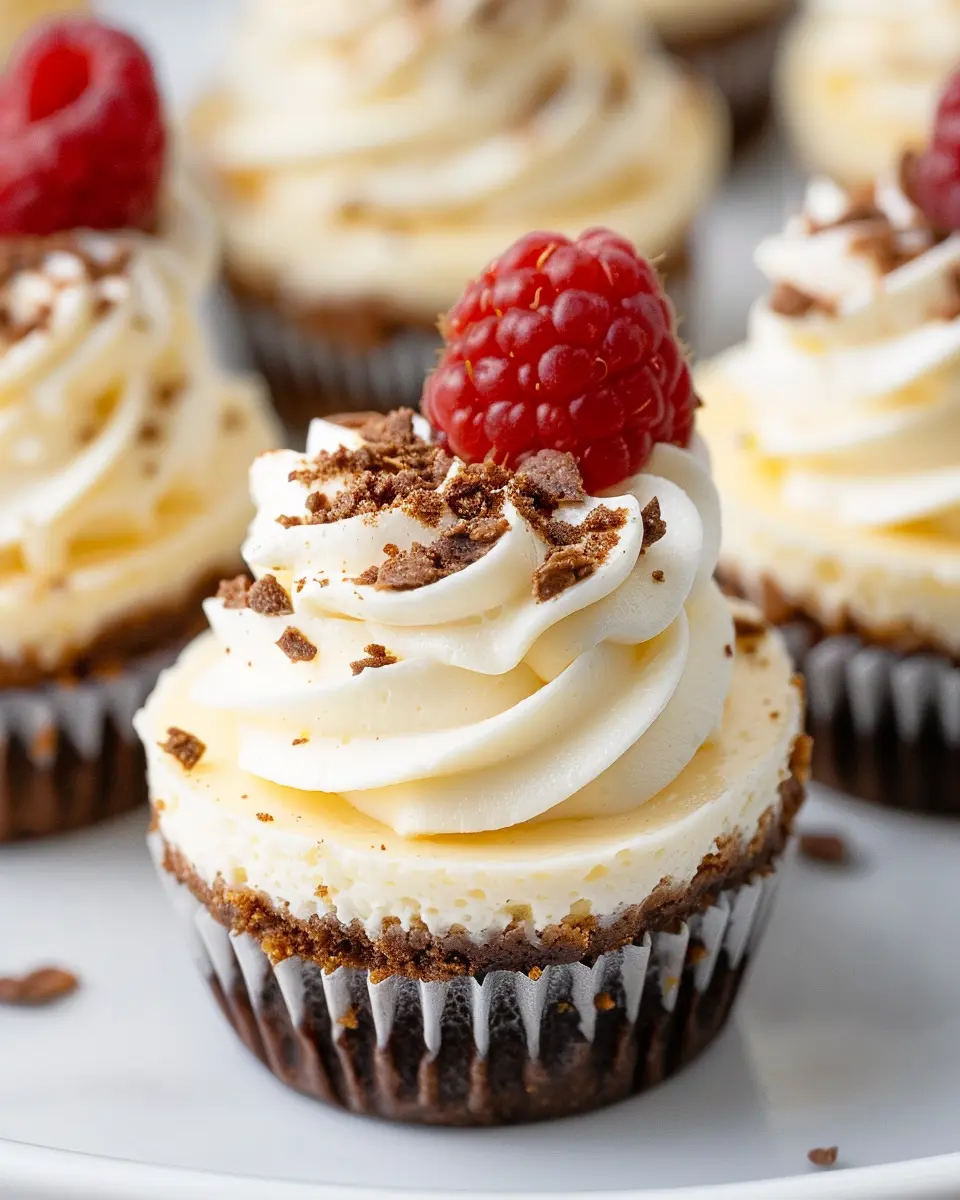
Chocolate-infused Mini Cheesecakes
If you’re a chocolate lover, why not incorporate it directly into your mini cheesecake cups? Try these ideas:
- Chocolate Graham Cracker Crust: Swap regular graham crackers for chocolate ones to kick things up a notch.
- Cocoa Powder: Mix some unsweetened cocoa powder into your cheesecake batter for rich chocolate flavor.
- Chocolate Ganache: Drizzle warm chocolate ganache over the top before serving for an indulgent finish.
For an added layer of flavor, consider pairing chocolate with peppermint extract or espresso powder!
No-bake Mini Cheesecake Options
Short on time or just not in the mood for baking? No worries! No-bake mini cheesecake cups are a breeze. Simply combine cream cheese, sugar, and vanilla extract, then fold in whipped cream for a light texture. Pour the mixture into your crust and chill until set. Top with your favorite fruits or chocolate drizzle for a quick and easy dessert. You can find a delightful no-bake cheesecake recipe here to get started!
Experiment with these ideas and let your creativity shine! The beauty of mini cheesecake cups is that they are versatile and can cater to any palate. Let us know what your favorite variations are!
Cooking Tips and Notes for Mini Cheesecake Cups
How to Avoid Cracks in Your Cheesecakes
Cracked cheesecakes are a common woe, but with a few simple steps, you can elevate your mini cheesecake cups to perfection. First, ensure all your ingredients are at room temperature. This helps create a smooth, well-blended batter, reducing air pockets that can lead to cracks. Additionally, bake your cheesecakes in a water bath. Not only does this regulate temperature, but it also creates a steamy environment that keeps them from drying out.
Tips for Perfecting the Filling Texture
The texture of your cheesecake filling is crucial for that creamy, dreamy bite. For optimal consistency, blend your cream cheese until completely smooth before adding any other ingredients. You might also consider using a food processor for an even finer texture. A tip from baking experts is to fold in whipped cream gently at the end; this adds a lightness to your mini cheesecake cups without losing that richness we all love.
When you’re ready to serve, think about topping these delightful mini cheesecake cups with fresh fruit or a homemade sauce for extra flavor and visual appeal. For more tips on cheesecake success, check out King Arthur Baking. Happy baking!
Serving Suggestions for Mini Cheesecake Cups
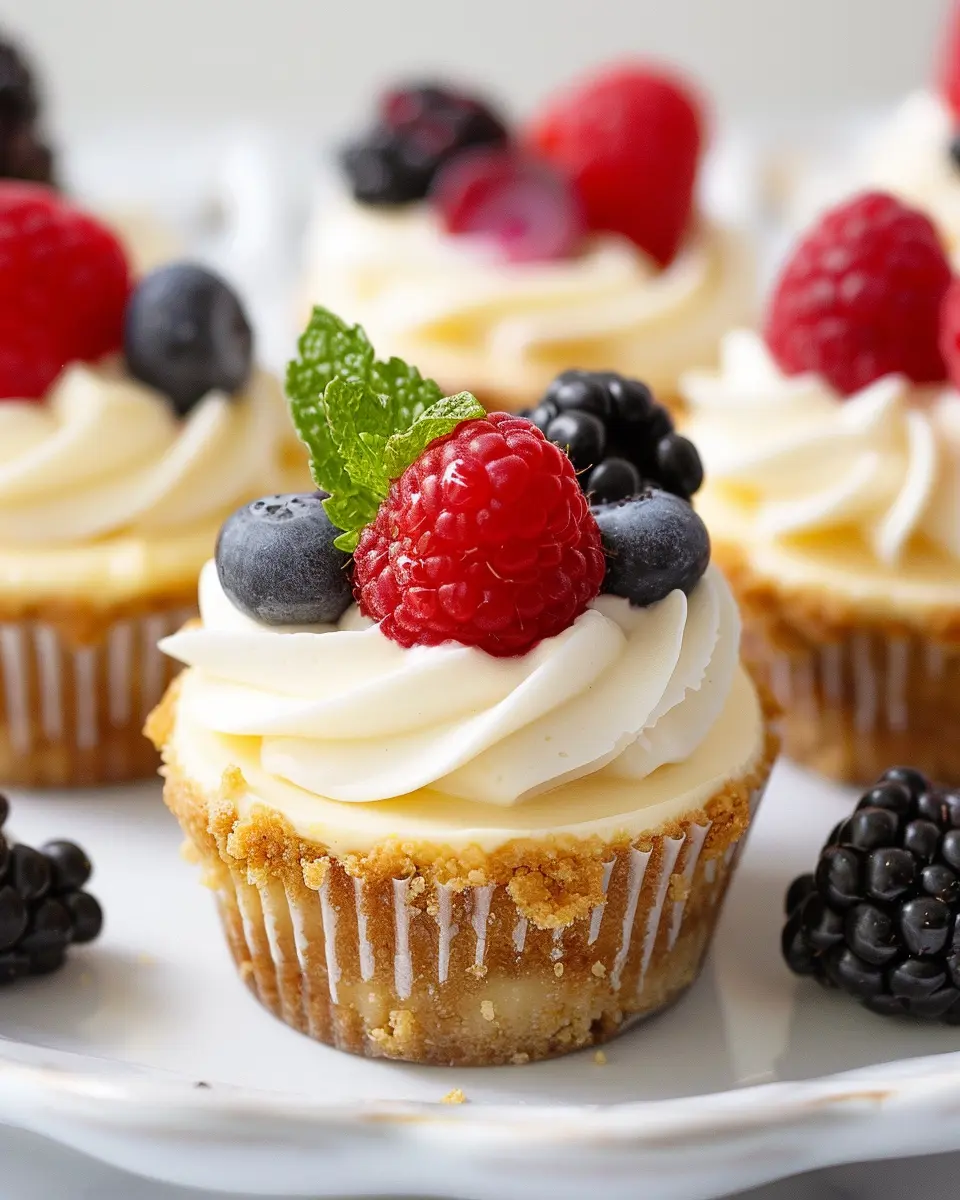
Elevate Your Presentation with Creative Plating Ideas
When it comes to serving mini cheesecake cups, presentation is key! Consider using clear glass dessert cups to showcase those delicious layers. Garnish each cup with a dollop of whipped cream, a sprinkle of crushed cookies, or fresh berries for that pop of color. You can even add a drizzle of chocolate or caramel sauce for an extra touch of indulgence. Set them on a rustic wooden board or elegant serving platter, and don’t be afraid to mix different flavors for a mini cheesecake flight!
Complementing your Mini Cheesecake Cups with Drinks and Snacks
Pair your mini cheesecake cups with refreshing beverages. I recommend iced tea or flavored lemonade—fizzy drinks can also add a fun twist. If you want some crunch alongside their creaminess, why not serve them with some light snacks? Think about offering fresh fruit, nuts, or even turkey bacon bites for savory contrast. The balance of sweet and salty is always a win!
For more creative serving ideas, check out this article on dessert pairings that dives into flavor combinations you won’t want to miss.
Time Breakdown for Mini Cheesecake Cups
Prep Time
Getting started on these delightful mini cheesecake cups is a breeze! You’ll spend about 15 minutes gathering your ingredients and preparing the crust and filling. It’s the perfect time to put on some music and unwind.
Bake Time
Once your cups are filled and ready, pop them in the oven for approximately 20 minutes. The key is to let them set just right while you anticipate their creamy deliciousness!
Total Time
From start to finish, you’re looking at around 40 minutes, which makes these mini cheesecake cups an ideal choice for an impromptu dessert or a special gathering. Who knew something so delicious could come together in such a short time?
Want to learn about pairing these treats with festive drinks? Check out this guide on mocktails to elevate your dessert experience!
Nutritional Facts for Mini Cheesecake Cups
When indulging in those delightful mini cheesecake cups, it’s good to know what you’re treating yourself to. Here’s a quick breakdown of their nutritional profile to help you enjoy them mindfully.
Calories per Cupcake
Each mini cheesecake cup typically contains around 150 calories, making it a sweet yet manageable dessert option for those watching their intake.
Sugar Content
With approximately 10 grams of sugar, these treats provide just the right amount of sweetness without going overboard. Moderation is key, and a small serving can satisfy your cravings.
Protein and Fat Breakdown
You’ll find about 3 grams of protein and 9 grams of fat in each cup. The creamy filling contributes to the fat content, while the addition of cream cheese adds a touch of protein, making these mini delights a balanced treat, especially if paired with fresh fruit.
For more on the benefits of incorporating desserts like these into your lifestyle, check out the American Heart Association. Enjoy every bite!
FAQs about Mini Cheesecake Cups
How do I store leftover mini cheesecakes?
Storing your mini cheesecake cups is quite simple! Place them in an airtight container in the refrigerator to keep them fresh. They generally last for about 3 to 5 days, so you’ll have some time to enjoy them. If you want to keep them for a little longer, consider wrapping each cup tightly in plastic wrap and then placing them in the freezer. They can be frozen for up to a month; just remember to let them thaw in the refrigerator before serving again.
Can I make these ahead of time?
Absolutely! One of the best things about mini cheesecake cups is how well they lend themselves to meal prep. You can make them up to two days in advance. After assembling, just pop them in the fridge until you’re ready to serve. This allows the flavors to meld beautifully! If you’re planning for a larger event or gathering, these little treats can be a stress-saver for your schedule.
What can I use as a crust substitute?
If you’re looking for alternatives to the classic graham cracker crust, you’re in luck! Here are a few ideas:
- Nut-Based Crust: Crushed almonds or walnuts mixed with a bit of butter can create a delicious gluten-free option.
- Oreo Crust: For a chocolatey twist, crushed Oreo cookies make a fantastic base.
- Coconut Crust: Unsweetened shredded coconut mixed with nuts adds a tropical flair.
Feel free to experiment with these substitutes to find your perfect fix! If you’re curious about more crust ideas, check out this guide on crust variations.
With these tips in mind, you’re all set to whip up some delightful mini cheesecake cups! Enjoy the deliciousness without the stress!
Conclusion on Mini Cheesecake Cups
Creating homemade desserts, like mini cheesecake cups, is an enriching experience that brings joy to both the baker and the lucky tasters. Not only do these delightful treats showcase your creativity, but they also allow you to explore flavors and textures tailored to your taste. Picture gathering friends or family to enjoy these bite-sized wonders—each cup a mini celebration!
Remember, the best part about baking these mini cheesecake cups is knowing you made them from scratch. So go ahead, whip up a batch, and savor every bite. For more inspiration, check out sources like The Spruce Eats and Epicurious for creative dessert ideas!
PrintMini Cheesecake Cups: Easy Indulgence for Your Dessert Cravings

Enjoy these delightful mini cheesecake cups that are perfect for satisfying your dessert cravings.
- Prep Time: 15 minutes
- Cook Time: 20 minutes
- Total Time: 2 hours 35 minutes
- Yield: 12 mini cheesecakes 1x
- Category: Dessert
- Method: Baking
- Cuisine: American
- Diet: Vegetarian
Ingredients
- 1 cup crushed graham crackers
- 1/4 cup melted butter
- 2 packs (16 oz) cream cheese, softened
- 1/2 cup granulated sugar
- 1 teaspoon vanilla extract
- 2 large eggs
- 1 cup sour cream
Instructions
- Preheat your oven to 325°F (160°C).
- In a bowl, mix the crushed graham crackers and melted butter until combined. Press the mixture into the bottom of cupcake liners in a muffin tin.
- In another bowl, beat the cream cheese until smooth. Gradually add the sugar and vanilla extract, continuing to mix.
- Add the eggs one at a time, mixing well after each addition. Finally, mix in the sour cream until combined.
- Spoon the cream cheese mixture over the crusts in the muffin tin.
- Bake for 18-20 minutes, or until the centers are set. Remove from the oven and let cool.
- Chill in the refrigerator for at least 2 hours before serving.
Notes
- These mini cheesecakes can be topped with fruit or chocolate for added flavor.
- They can also be made ahead of time and stored in the fridge.
Nutrition
- Serving Size: 1 cup
- Calories: 200
- Sugar: 15g
- Sodium: 150mg
- Fat: 12g
- Saturated Fat: 7g
- Unsaturated Fat: 3g
- Trans Fat: 0g
- Carbohydrates: 20g
- Fiber: 1g
- Protein: 3g
- Cholesterol: 50mg
Keywords: Mini Cheesecake Cups, dessert, easy dessert, cheesecake