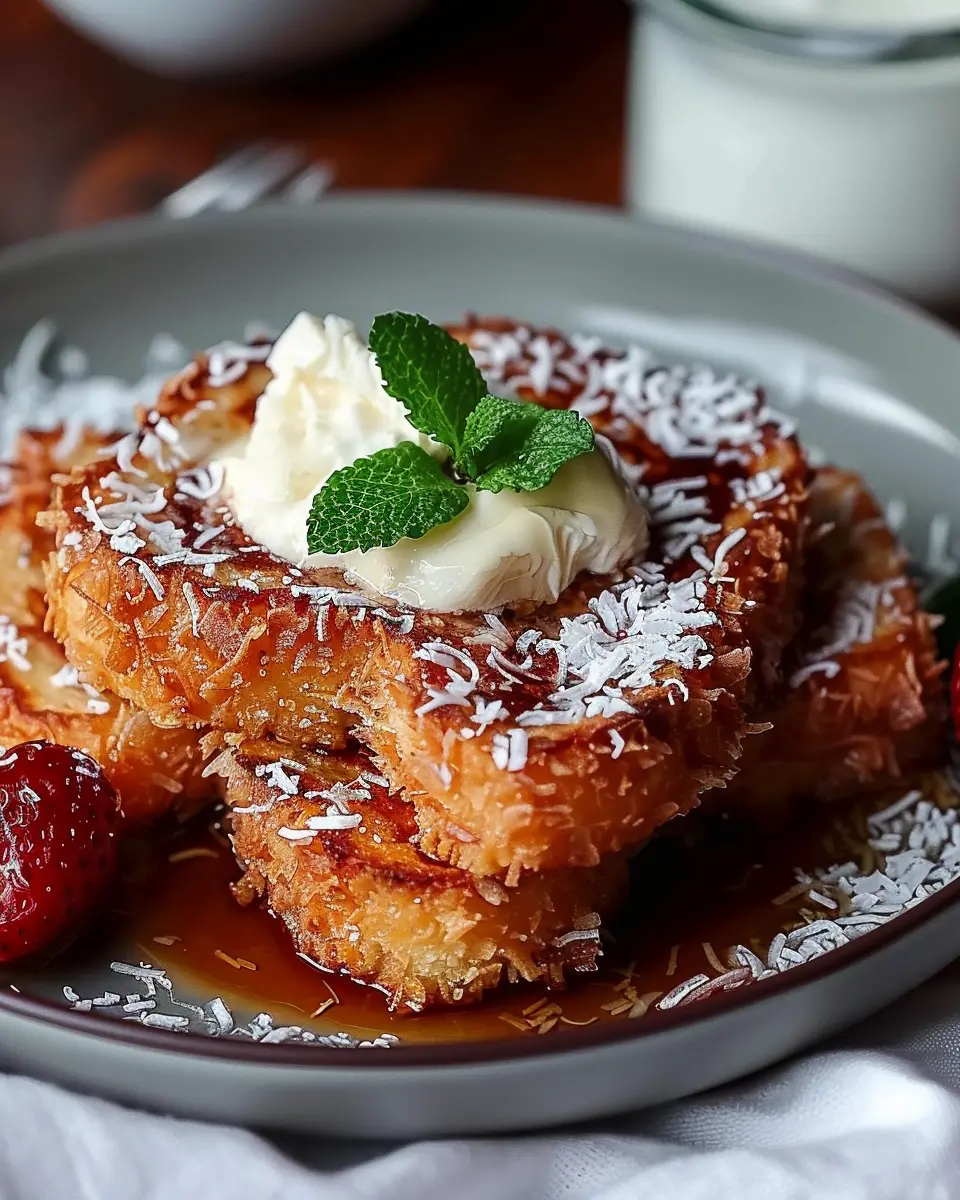
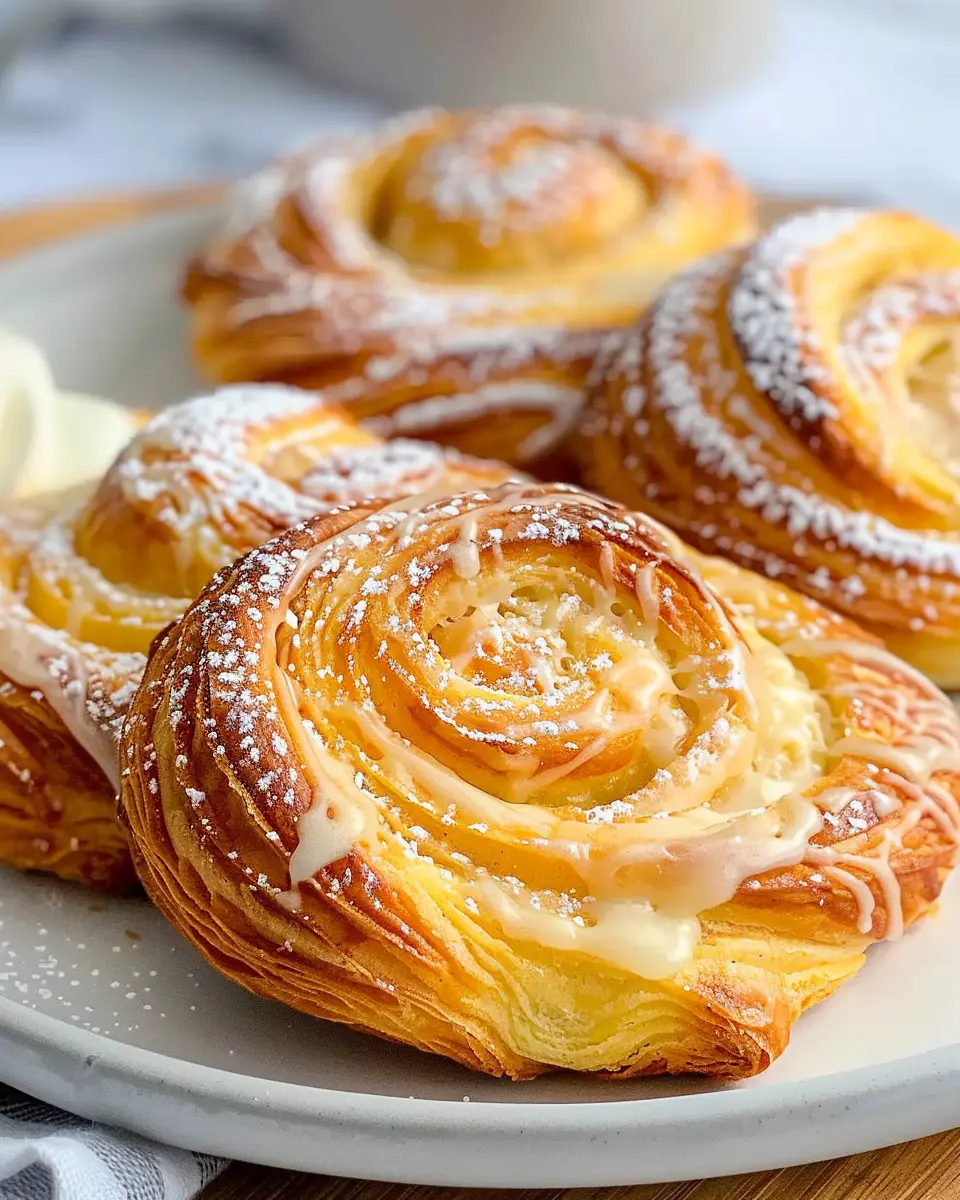
Introduction to Homemade Danish Recipe
If you’ve ever walked past a bakery and been tempted by the golden crusts of Danish pastries, you’re not alone. This delicious treat is loved for its flaky layers, sweet fillings, and delightful flavors. While it may seem intimidating to make them at home, mastering a Homemade Danish Recipe can be incredibly rewarding. Let’s explore why investing your time in crafting these delectable pastries is worth it.
Why Homemade Danish Pastries are Worth It
Making your own Danish pastries allows you to customize every aspect, from the dough to the filling. Sure, you could grab a box at the store, but nothing compares to the fresh taste and aroma of homemade pastries that fill your kitchen. Plus, with the right ingredients, you can elevate your pastries to gourmet levels — think cream cheese with fresh fruit or decadent chocolate.
- Tailor Your Flavors: Go beyond the traditional fillings and get creative! Want to indulge with chocolate and almond cream, or keep it classic with cream cheese and Turkey Bacon? The choice is yours!
- Freshness Matters: Nothing beats fresh, warm pastries. Pastries that come right out of the oven can elevate any breakfast or brunch gathering. Research shows that fresh ingredients can lead to better flavor profiles and textures — which store-bought options often lack.
- Healthier Choices: By making your own pastries, you control what goes in, allowing you to reduce sugars or opt for whole grains. You can even substitute Chicken Ham or Beef into savory versions to add a nutritious twist.
Now, I remember the first time I tried making Danish pastries from scratch. I was baffled yet thrilled as I watched the dough rise and transform. And while the process does take a little time and patience, the end result is something that will leave your friends thinking you’re a pro in the kitchen!
So, ready to dive into the world of Homemade Danish Recipes? With a little dedication and our easy-to-follow guide, you’ll impress your guests and satisfy your cravings in no time. Don’t hesitate — grab your ingredients and let’s get baking! For a helpful overview of basic pastry dough techniques, check out this informative guide.
Ingredients for Homemade Danish Recipe
Creating a perfect homemade Danish recipe starts with the right ingredients. Let’s break it down so you can whip these delicious pastries up with confidence!
Key Ingredients for the Dough
To achieve that flaky, buttery dough, you’ll need:
- All-purpose flour – essential for the structure.
- Unsalted butter – for richness and flavor, ensure it’s cold for flakiness.
- Whole milk – adds moisture to the dough.
- Granulated sugar – for a slight sweetness.
- Active dry yeast – gives the dough its delightful rise.
- Salt – to enhance all the flavors.
For a deeper dive into dough-making techniques, the King Arthur Baking website is a fantastic resource.
Essential Ingredients for the Cream Cheese Filling
Now for the creamy goodness inside your Danish:
- Cream cheese – the star of the show; use full-fat for the best texture.
- Powdered sugar – sweetens and softens the cream cheese.
- Vanilla extract – adds a lovely aroma.
- Egg yolk – helps bind the filling together beautifully.
Optional Toppings and Add-Ins
Don’t forget to customize your homemade Danish recipe! Consider adding:
- Fresh fruit (like berries or apples) – for a burst of natural sweetness.
- Chocolate chips – because who doesn’t love chocolate?
- Nuts (like almonds or pecans) – for that extra crunch.
By mixing and matching these ingredients, you can create a version of Danish pastry that suits your taste perfectly. Happy baking!
Step-by-Step Preparation of Homemade Danish
Creating delicious homemade Danish pastries is not just about baking—it’s an art form. Each step of the process allows you to unleash your inner baker, and we’re here to guide you every step of the way. Let’s get started!
Make the dough
The first thing you’ll need is a rich, buttery dough that serves as the foundation for your homemade Danish recipe. Start by gathering the following ingredients:
- 4 cups all-purpose flour
- 1/2 cup sugar
- 1 tablespoon instant yeast
- 1 teaspoon salt
- 1 cup whole milk, warmed
- 2 large eggs
- 1/2 cup unsalted butter, softened
Instructions:
- In a large mixing bowl, combine the flour, sugar, instant yeast, and salt.
- Add the warmed milk and eggs, and mix until a dough starts to form.
- Gradually add the softened butter and knead until you achieve a smooth and elastic dough. This should take about 5-7 minutes.
- Cover the dough with a damp cloth and let it rise in a warm place until it doubles in size, about 1-2 hours.
Wondering why instant yeast is a game-changer? Check out this article on the benefits of different types of yeast to learn more.
Prepare the butter block
To achieve that flaky, layered texture that makes a Danish pastry divine, you need a butter block. This is crucial for the lamination process.
Ingredients for the butter block:
- 1 1/2 cups unsalted butter, chilled
Instructions:
- Place the chilled butter between two sheets of parchment paper.
- Using a rolling pin, pound and roll the butter into a flat rectangle, about 8×10 inches.
- Make sure the butter remains cold throughout the process. Once formed, refrigerate it again while your dough is rising.
The cold butter creates distinct layers in your pastry, leading to that delightful flakiness.
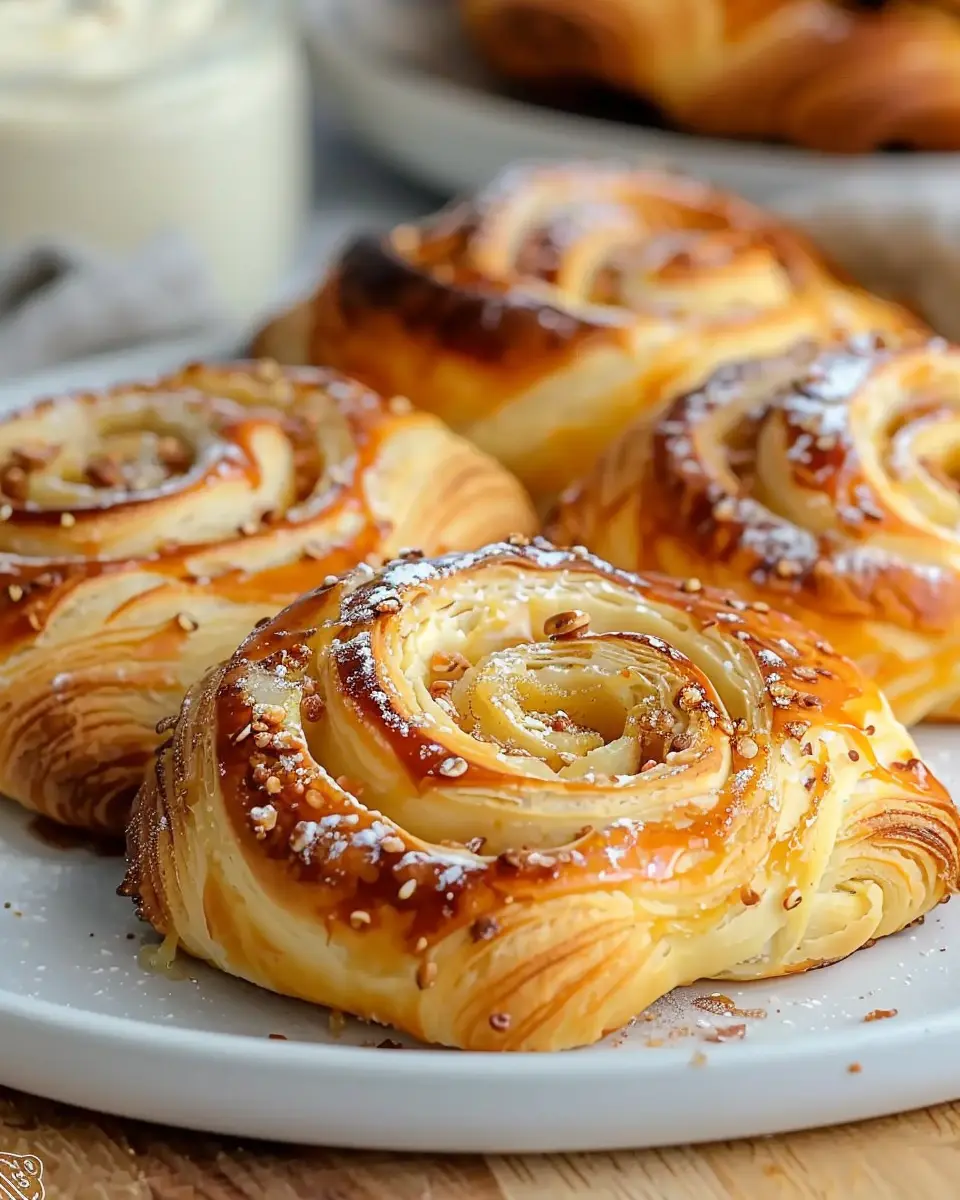
Laminate the dough
Once your dough has risen, it’s time to bring the magic of homemade Danish recipe lamination into play.
Instructions:
- On a floured surface, roll out your dough into a rectangle, about 16×24 inches.
- Center the chilled butter block in the middle of the dough and fold the dough over the butter like a letter, sealing the edges.
- Roll out the dough into a long rectangle again, then fold it into thirds like a letter once more. This is called a “turn.”
- Repeat this process of rolling and folding a total of three times, making sure to refrigerate for 30 minutes between each turn.
Sure, it seems a little time-consuming, but trust me, the final product is worth every minute!
Shape the Danish pastries
Now, it’s time to have some fun with shaping your pastries. Be creative—there’s so much you can do!
Instructions:
- Roll out your laminated dough into a large rectangle one last time.
- Cut the dough into squares or triangles, depending on your preference.
- Fill the center with your chosen ingredients—think fruity fillings like raspberry, or savory options like Turkey Bacon and Chicken Ham.
- Fold the edges of the dough over the filling to create a nice little pocket or twist for added visual appeal.
This is where your artistic flair can shine! Use fillings that resonate with your favorite flavors.
Proof and bake the Danish
The final step is baking your masterpieces to golden perfection.
Instructions:
- Preheat your oven to 375°F (190°C).
- Place the shaped Danish pastries on a parchment-lined baking sheet, leaving space for them to expand.
- Cover the pastries with a towel and let them proof for about 30-45 minutes, or until they puff up.
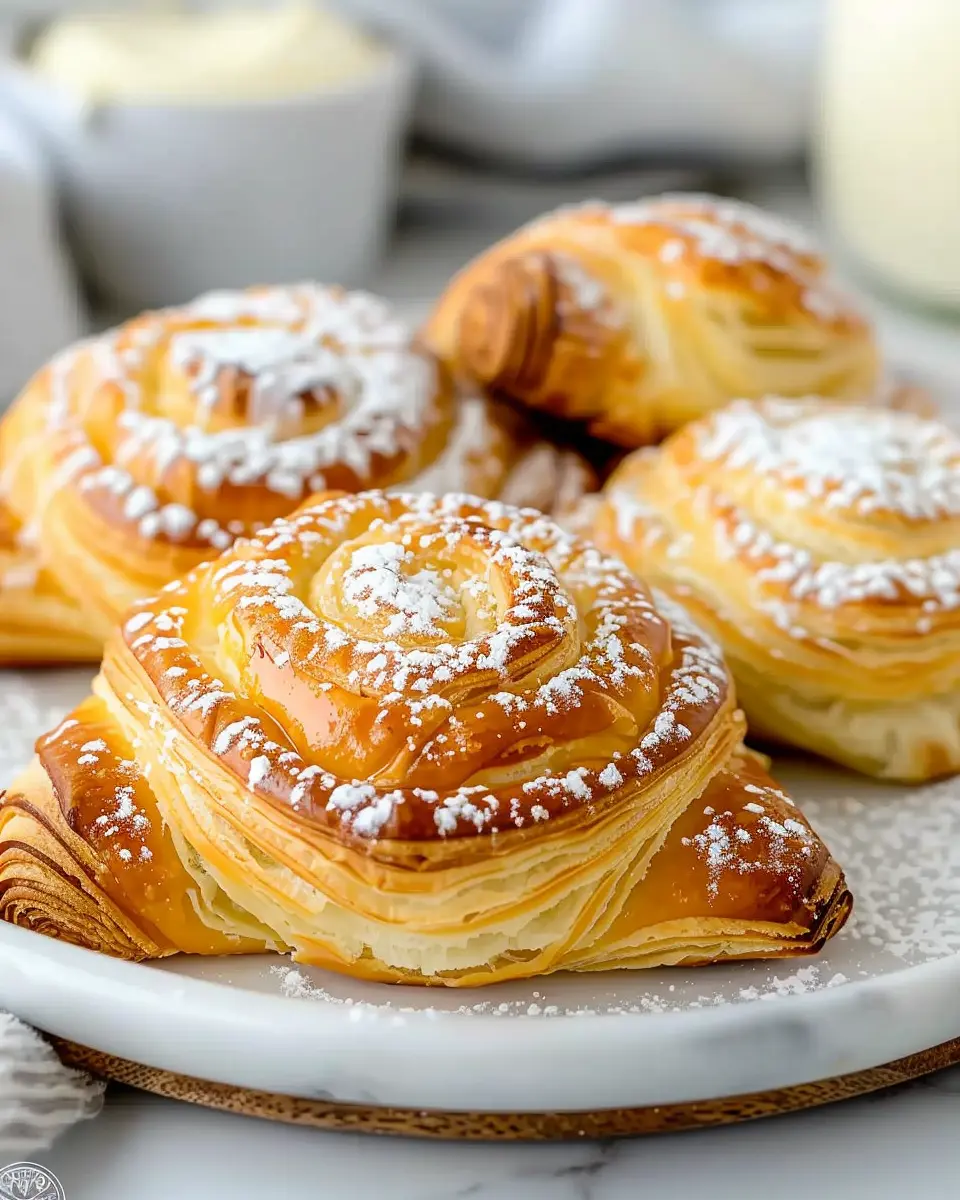
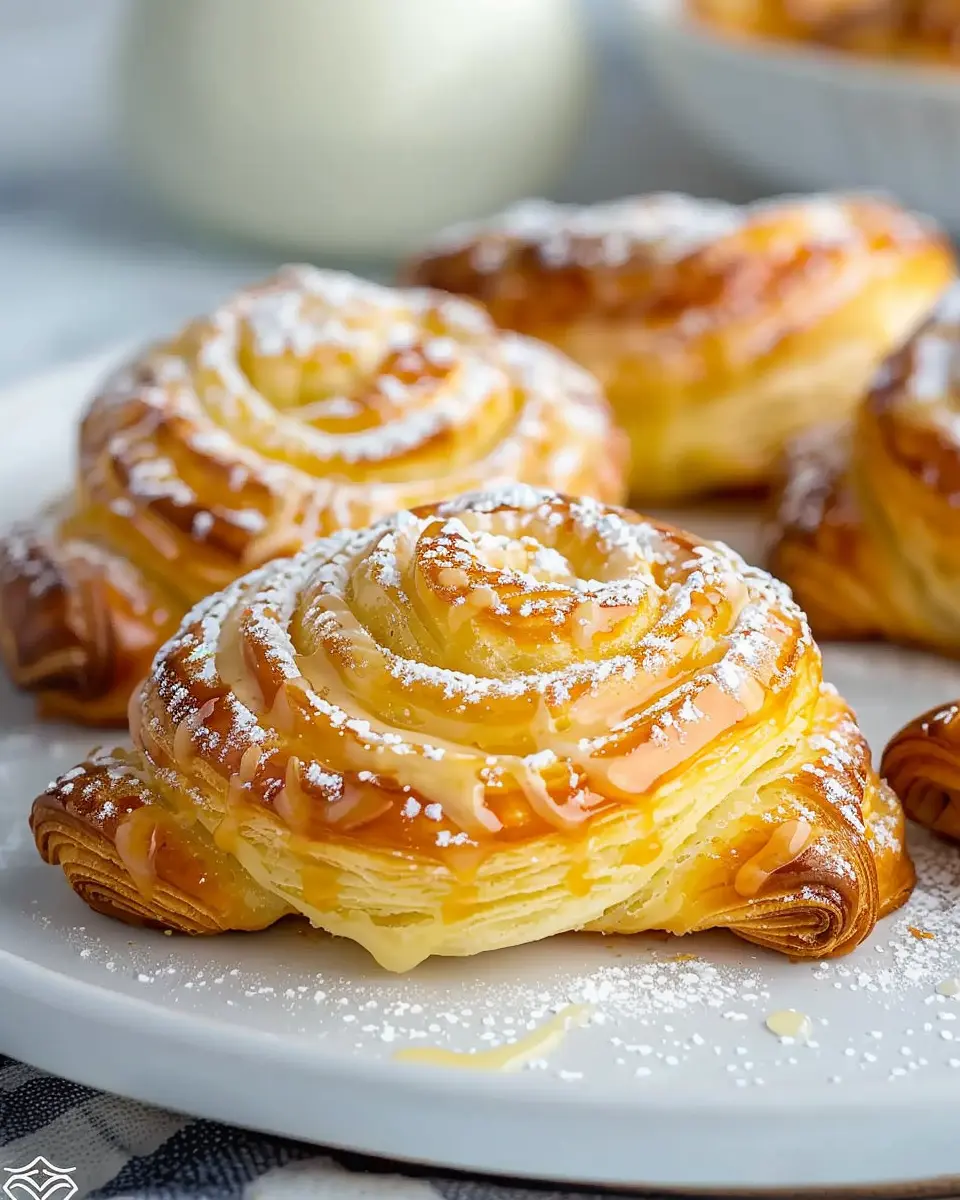
- Bake for 20-25 minutes or until golden brown and flaky.
After baking, allow them to cool slightly before glazing or serving—if you can wait that long!
From the moment you start making your homemade Danish until the first bite, you’ll find that the process is truly rewarding. Plus, you can show off your culinary skills to family and friends with a beautiful homemade treat that they’ll never forget!
Variations on Homemade Danish Recipe
Creating your own delicious pastries can be a fun and rewarding experience in the kitchen! Once you’ve mastered the basic homemade Danish recipe, why not branch out and experiment with various fillings? Here are a couple of our favorite twists to impress your friends and family.
Fruit-filled Danish Pastries
Fruit-filled Danish pastries are a fantastic way to celebrate seasonal fruit or use up what you have on hand. Consider filling your pastries with:
- Fresh Berries: Blueberries, strawberries, or raspberries provide a sweet-tart flavor that works wonderfully with the buttery dough.
- Apple and Cinnamon: Sauté apples with a hint of cinnamon for a classic autumn-inspired treat.
- Peach or Apricot Preserves: A dollop of your favorite jam can add a sweet and tangy twist that pairs beautifully with cream cheese.
Just remember to balance the filling to avoid sogginess — a sprinkle of cornstarch can help.
For inspiration on different fruit combinations, check out InSeasonFruit.com.
Almond-flavored Danish Pastries
Another delightful variation is the almond-flavored Danish pastry. To create this fabulous treat, consider these elements:
- Almond Cream Filling: A simple mix of almond paste, sugar, and butter creates a rich, nutty flavor. It’s perfect for those who love the elegance of almond.
- Sliced Almond Garnish: Top your pastries with sliced almonds before baking for an added crunch and visual appeal.
Almonds are not only delicious but also rich in nutrients like vitamin E and magnesium, making them a wholesome addition to any pastry. You can find more information on the health benefits of almonds at AlmondsHealthBenefits.com.
By experimenting with these variations, your homemade Danish recipe can become a versatile delight that suits any palate!
Cooking Tips and Notes for Homemade Danish
Importance of chilling the dough
When making your Homemade Danish Recipe, chilling the dough is crucial! Why? Chilling helps maintain the right texture by solidifying the layers of butter, ensuring that they won’t melt into the dough during baking. This step results in a beautifully flaky pastry. Aim for at least 30 minutes in the fridge after you’ve rolled the dough, but feel free to chill it longer if your schedule allows. It will only enhance the flavor and texture!
Substituting ingredients for variations
Feel like experimenting? Substituting ingredients can lead to delightful variations. For instance, if you’re not a fan of traditional fillings, try using cream cheese mixed with fresh fruits or even nut butters instead. You can also swap out sugar for maple syrup for a unique twist in your sweet dough. Check out The Kitchn for more ideas on ingredient substitutions in baked goods.
Since you’re already creating a Homemade Danish, it’s the perfect opportunity to tailor it to your taste and dietary needs. Enjoy the process!
Serving Suggestions for Homemade Danish
When it comes to enjoying your Homemade Danish Recipe, the right pairing can elevate the experience to a whole new level.
Perfect pairings with coffee or tea
A warm cup of coffee or tea is the ideal companion for a freshly baked Danish. The buttery, flaky layers of your pastry perfectly complement the rich flavors of coffee or the soothing notes of herbal tea. Experiment with different brews—perhaps a dark roast coffee for a bold kick or a fragrant chai tea for a spicy twist. Don’t forget to keep it simple; a sprinkle of powdered sugar on top can make all the difference.
Festive presentation ideas
Presenting your Homemade Danish doesn’t have to be complicated. Use a rustic wooden board or a chic cake stand for an inviting display. Garnish with seasonal fruits, like berries in summer or oranges in winter, for a splash of color. For a casual gathering, consider serving these pastries alongside fresh fruit and yogurt to create a delightful breakfast platter that’s both inviting and satisfying.
For further inspiration, check out this guide on dinner party ideas.
Time Breakdown for Homemade Danish
When it comes to perfecting your Homemade Danish Recipe, understanding the time commitment can help you plan your baking adventure. Below is a quick time breakdown to guide you through the process seamlessly.
Preparation Time
You’ll need about 30 minutes to mix your ingredients and create the dough. Make sure to have everything organized in advance. A well-set kitchen is key!
Chilling Time
After mixing, let your dough chill in the refrigerator for at least 2 hours. This step is crucial for achieving that flaky texture we all love in Danish pastries.
Baking Time
Once shaped, your Danish will need about 20-25 minutes in the oven. Keep an eye on them to achieve that golden-brown perfection.
Total Time
In total, plan for roughly 3 hours for your Homemade Danish Recipe, which includes preparation, chilling, and baking. Although it might seem lengthy, the end result is well worth the wait!
For more baking tips, check out this guide on pastry techniques from King Arthur Flour!
Nutritional Facts for Homemade Danish
When indulging in your Homemade Danish Recipe, it’s essential to be mindful of the nutritional content of each pastry. Here’s a breakdown to help you make informed choices.
Calories per pastry
On average, a single homemade Danish contains around 300-400 calories. This can vary based on the filling you choose, whether it’s fruit-based or a rich custard.
Key nutrients to note
While these pastries are a delightful treat, they also provide:
- Carbohydrates: A source of energy, primarily from the dough.
- Fats: Important for flavor and flakiness; consider using healthier oils or butters when baking.
- Protein: From ingredients like chicken ham or turkey bacon, if added as a savory option.
For more in-depth nutritional guidelines, consider checking out the USDA’s National Nutrient Database here. Balancing your pastry with a side of fresh fruit can also enhance the nutritional profile. Enjoy experimenting in the kitchen!
FAQs about Homemade Danish Recipe
How can I achieve flaky layers?
The secret to those irresistibly flaky layers in your Homemade Danish Recipe lies in your dough’s preparation. Here’s how to master it:
- Cold Ingredients: Always use cold butter and liquids when preparing your dough. This helps maintain the butter’s structure so that it creates steam during baking, resulting in that sought-after flakiness.
- Laminate Properly: Incorporate the butter using the “turn and fold” technique. Roll the dough out, place a slab of butter in the center, and fold the dough over it. Repeat this process several times to create layers.
- Resting Time: Letting your dough rest in the fridge after each fold works wonders. Aim for at least 30 minutes between folds to let the gluten relax.
For more tips on achieving flakiness, check out this baking guide.
What are good substitutes for cream cheese?
If you’re looking to replace cream cheese in your Homemade Danish Recipe, consider these creamy alternatives:
- Mascarpone Cheese: Slightly sweeter and creamier than cream cheese, mascarpone works beautifully in most recipes.
- Greek Yogurt: For a healthier option, use strained Greek yogurt. It offers a tangy flavor and a similar texture.
- Ricotta Cheese: Blend ricotta with a bit of lemon juice for a great substitute that’s both rich and satisfying.
Can I make the dough ahead of time?
Absolutely! Making the dough ahead can save you time and is a great strategy. You can prepare the dough, wrap it tightly in plastic wrap, and refrigerate it for up to two days. Alternatively, freeze it for up to a month. Just remember to thaw it in the refrigerator overnight before use. Planning ahead means you can whip up a fresh batch of delicious Danish pastries whenever you need a sweet treat!
Conclusion on Homemade Danish Recipe
Baking your own pastries can be one of life’s simplest joys—there’s something incredibly satisfying about pulling a tray of golden-brown danishes from the oven. This homemade Danish recipe allows you to create a warm, flaky delight that fills your kitchen with inviting aromas.
Imagine the pleasure of enjoying fresh pastries made right at home instead of store-bought options. Plus, you’ll have the control to choose fillings that cater to your taste, whether it’s turkey bacon or sweet fruit. So, roll up those sleeves, unleash your inner baker, and enjoy the creative process! For more tips and tricks, you might want to check out baking techniques from experts. Happy baking!
PrintHomemade Danish Recipe: Easy Treats to Master for Your Family

Learn how to create delightful homemade Danish pastries with this easy recipe!
- Prep Time: 20 minutes
- Cook Time: 25 minutes
- Total Time: 45 minutes
- Yield: 12 pastries 1x
- Category: Dessert
- Method: Baking
- Cuisine: Danish
- Diet: Vegetarian
Ingredients
- 2 cups all-purpose flour
- 1/2 cup unsalted butter
- 1/2 cup granulated sugar
- 1/2 cup milk
- 1 large egg
- 1 packet instant yeast
- 1/4 teaspoon salt
- 1 teaspoon vanilla extract
- 1/2 cup fruit preserves
Instructions
- In a mixing bowl, combine flour, sugar, yeast, and salt.
- In a saucepan, melt butter and mix with milk. Allow to cool slightly.
- Add the milk mixture to the dry ingredients along with the egg and vanilla. Stir until a dough forms.
- Knead the dough on a floured surface until smooth. Let it rise until doubled in size.
- Roll out the dough and cut it into squares. Place a spoonful of fruit preserves in the center of each square.
- Fold the corners of the squares towards the center and press to seal.
- Place on a baking sheet and let rise again for 30 minutes.
- Bake at 375°F (190°C) for 20-25 minutes or until golden brown.
Notes
- Ensure your butter is soft but not melted for best results.
- Experiment with different fillings like cheese or chocolate.
Nutrition
- Serving Size: 1 pastry
- Calories: 150
- Sugar: 5g
- Sodium: 150mg
- Fat: 7g
- Saturated Fat: 4g
- Unsaturated Fat: 3g
- Trans Fat: 0g
- Carbohydrates: 20g
- Fiber: 1g
- Protein: 2g
- Cholesterol: 30mg
Keywords: Homemade Danish Recipe You Can Master at Home Easily