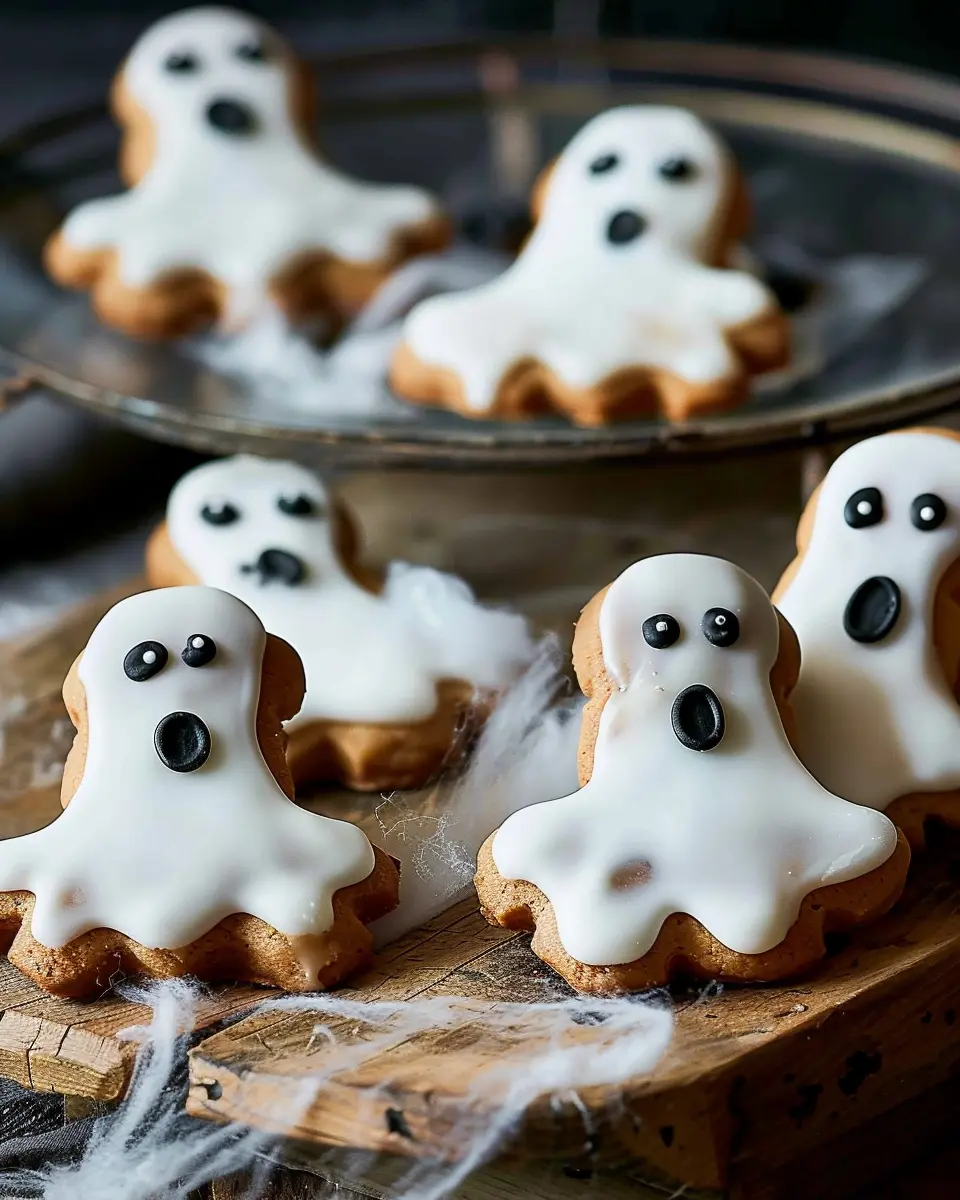
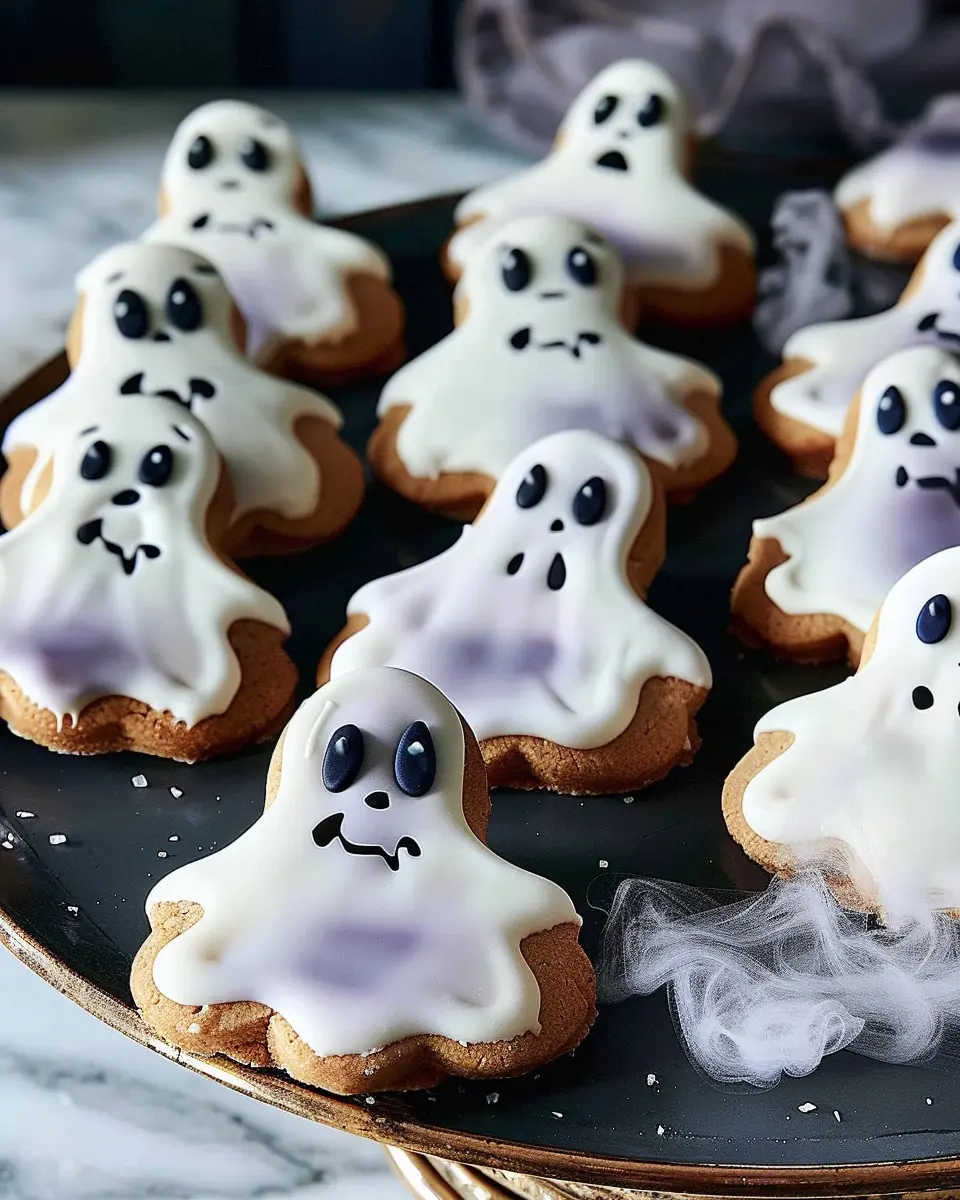
Introduction to Ghost Cookies
If you’re a young professional balancing work, social life, and perhaps a burgeoning cooking hobby, ghost cookies might just become your new favorite treat. These adorable, festive delights not only bring a playful spirit to the table but also offer a fun and straightforward way to hone your baking skills without breaking the bank or consuming too much of your precious time. With Halloween approaching, there’s no better moment to whip up these whimsical cookies that are sure to impress friends and co-workers alike!
What’s great about ghost cookies is their versatility. You can sprinkle in your favorite ingredients, whether you prefer dark chocolate chips or a dash of sea salt on top. The appeal lies in their simplicity—starting with a basic cookie dough and customizing it to your liking makes the process enjoyable and stress-free. If you’re looking for quick baking projects, check out sites like Food Network or Allrecipes for inspiration.
Why Ghost Cookies are Perfect for Young Professionals
As a young professional, time is often your most valuable resource. The allure of fast, easy recipes becomes irresistible amid a busy work week. Here’s why ghost cookies are an ideal choice for you:
- Quick Preparation: With most ghost cookie recipes taking about 30 minutes from start to finish, you can bake a batch in no time, making them perfect for last-minute gatherings.
- Minimal Ingredients: You likely already have many of the essentials—flour, sugar, baking soda, and vanilla extract—on hand. A quick trip to the store might be just for some fun decorating supplies.
- Engaging and Fun: Get creative! Use white icing for the ghostly faces and let out your inner artist. Cooking can be a form of relaxation, providing a break from the hustle of work.
Making ghost cookies is not just about satisfying your sweet tooth. It’s an opportunity to unwind and enjoy a little crafty fun in the kitchen. So grab your apron, invite a friend over, and let’s get started on this festive baking adventure!
Ingredients for Ghost Cookies
Essential ingredients you’ll need
Creating delightful ghost cookies requires a handful of essential ingredients that bring a spook-tacular flavor and texture. Here’s what you’ll need to whip up these haunted treats:
- 1 cup of all-purpose flour: This is the base for our cookies, giving them structure.
- 1/2 cup of unsalted butter: For that rich, creamy goodness.
- 3/4 cup of granulated sugar: Sweetness is key, and sugar helps achieve that perfect crisp.
- 1 egg: A binder that helps the cookies hold their shape.
- 1/2 teaspoon of baking powder: For that delightful rise.
- 1/4 teaspoon of salt: Just a pinch enhances all the flavors.
- 1 cup of white chocolate chips: These add sweetness and a great ghostly finish.
Optional ingredients for a twist
Now, let’s spice things up a bit! If you want to put your own twist on these ghost cookies, consider adding:
- Sprinkles or food coloring: For that festive touch!
- Chopped nuts or dried fruits: These add texture and give your cookies a unique flavor profile.
- Flavored extracts (like vanilla or almond): A small splash can elevate your cookies to gourmet status.
Baking is an art, and experimenting with flavors is part of the fun! So, why not mix in some of these optional ingredients for a version of ghost cookies that’s uniquely yours? Happy baking! For more tips and tricks on cookie-making, check out this baking guide for insights from the pros.
Preparing Ghost Cookies
Creating ghost cookies is a delightful way to add a festive touch to your baking repertoire, especially during Halloween. Not only are these cookies easy to make, but they’re also a fun activity to do with family and friends. Let’s dive into the steps to prepare these cute, spooky treats!
Gather Your Materials
Before you start the baking adventure, it’s essential to gather all your materials. No one likes to be in the middle of a recipe and realize you’re missing a key ingredient. Here’s what you’ll need:
- Sugar cookies (store-bought or homemade)
- Icing sugar
- Large marshmallows
- Black writing icing
- Cooking spray or vegetable shortening (to prevent sticking)
- A large mixing bowl
- Baking sheet lined with parchment paper
By preparing all your materials ahead of time, the ghost cookie assembly line will run smoothly!
Sift the Icing Sugar
Sifting your icing sugar helps achieve a smooth consistency, which is crucial for an elegant finish. Place your icing sugar in a fine mesh sieve over a large mixing bowl. Gently tap the sieve with a spoon to let the sugar fall through. This process eliminates any lumps, ensuring your frosting is silky smooth. Aim for about one cup of icing sugar to start, but you can always adjust the amounts later based on how many cookies you’re making.
Prepare the Marshmallows
Next up, let’s prepare the stars of the show: the marshmallows. You’ll want to use jumbo marshmallows, as they provide a perfect base for the ghostly shape. Take each marshmallow and gently flatten it by pressing it down with your palm or the bottom of a glass. This gives your ghost a little extra dimension and helps the icing stick better.
If you’re looking for extra tips, check out this article on the best ways to melt marshmallows, which can help you explore other creative uses for marshmallows!
Assemble the Cookies
With your cookies and marshmallows ready, it’s time to assemble your ghost cookies. Start by using a small amount of icing to attach a flattened marshmallow to the top of each cookie. The icing acts like glue, so don’t be shy with it—just be careful not to drown your cookie in icing. You want enough to hold the marshmallow securely without overwhelming the pleasant sugar cookie flavor.
Drizzle the Icing
Now comes the fun part: icing! Take your sifted icing sugar and add a little water or milk until it reaches a pourable consistency. Use a spoon or piping bag to drizzle the icing over the marshmallow ghosts. Let the icing drip down the sides for a drippy, ghostly effect. If you want a more even coating, feel free to dip the tops of the marshmallows directly into the icing.
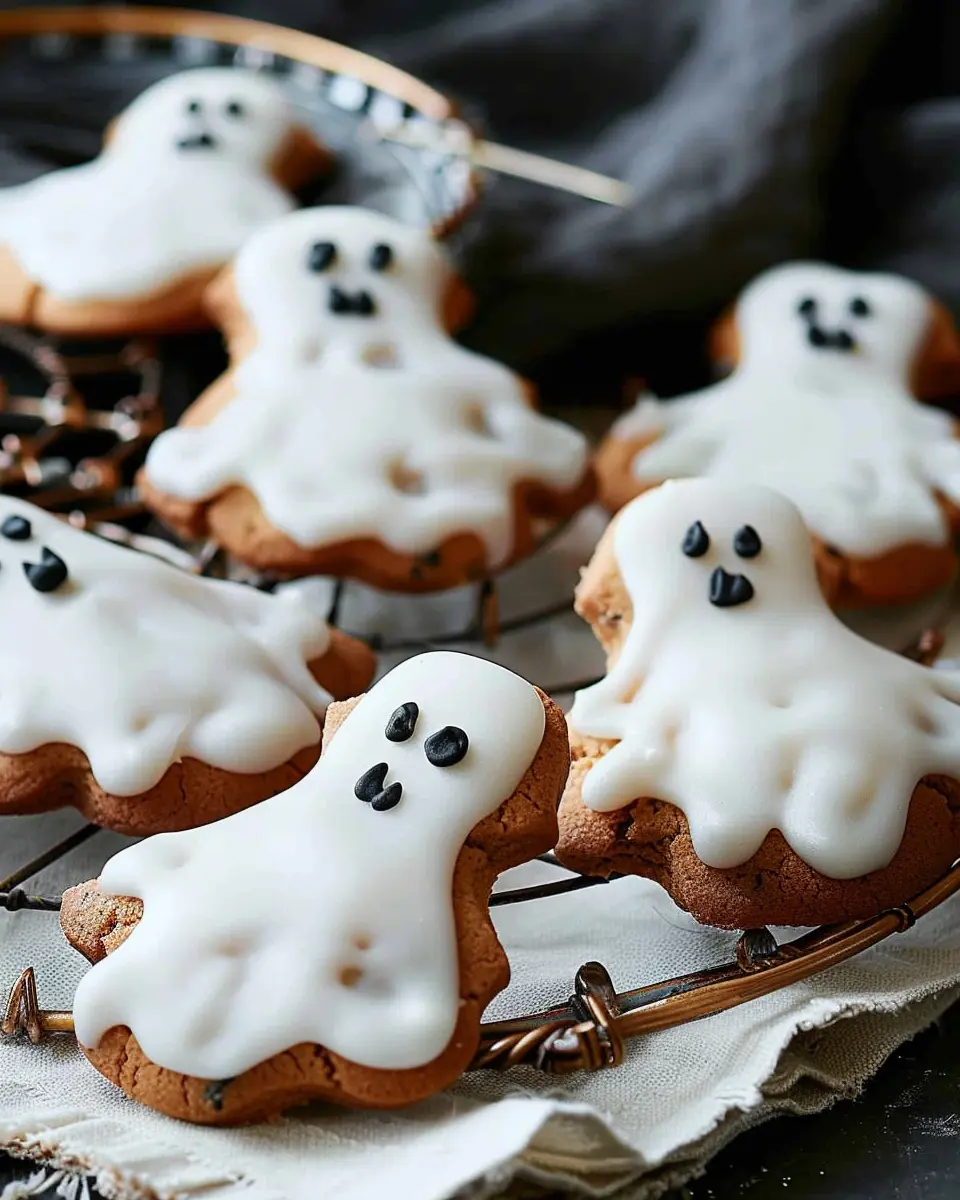
Decorate with Black Writing Icing
To finish off your ghost cookies, grab that black writing icing. With steady hands, add eyes and mouths to your marshmallow ghosts. This is where you can really let your creativity shine! Make some ghosts look friendly and others a bit spooky—after all, Halloween is about a playful scare!
These ghost cookies not only taste fantastic but also make for a charming centerpiece on any Halloween dessert table. After following these steps, you’ll have a batch of adorable, sweet ghost cookies that are bound to impress your guests. Plus, they’re so fun to make that you’ll want to share them with everyone! Happy baking!
Variations on Ghost Cookies
When it comes to ghost cookies, the fun doesn’t have to stop at the classic version. There are plenty of delightful variations you can whip up to impress your friends at Halloween gatherings. Let’s explore two spooky delights that add unique twists to the traditional ghost cookie concept.
Spooky Stardust Cookies
Imagine biting into a cookie that sparkles with edible glitter and vibrant hues! Spooky stardust cookies take your haunting experience to the next level. To create these magical treats, start with your basic ghost cookie dough and stir in a selection of colorful sprinkles.
- Ingredients:
- Basic ghost cookie dough
- Edible glitter or shimmering sprinkles
- Colorful icing for decoration
Once baked, allow the cookies to cool before adorning them with icing and a generous sprinkle of stardust. The glow of the glitter will catch everyone’s eye as they savor these whimsical treats. For inspiration, check out this guide on cookie decoration techniques from Taste of Home.
Halloween-Themed Soul Cakes
Feeling adventurous? Why not try your hand at Halloween-themed soul cakes? These delightful pastries trace back to ancient traditions and pair beautifully with the visual appeal of ghost cookies. Though soul cakes are traditionally round and spiced, you can shape them into ghoulish figures for that festive touch.
- Ingredients:
- Flour
- Sugar
- Spices (such as nutmeg or cinnamon)
- Dried fruit (like raisins or currants)
These cookies not only taste delicious but also come packed with historical significance. Serve them alongside your ghost cookies to create a memorable and spooky dessert table. Get your historical infusion with more information from BBC Good Food.
By exploring these variations, you can create a delightful spread that celebrates both the fun and flavor of Halloween. So gather your ingredients, unleash your creativity, and let the spooky vibes flow!
Cooking tips and notes for Ghost Cookies
Creating delightful ghost cookies is about more than just following a recipe—it’s about the experience! Here are some handy tips to ensure your spooky treats turn out perfectly.
Ensuring perfect icing consistency
The key to an eye-catching ghost cookie lies in the icing. You want a smooth consistency that holds its shape without being too runny. Aim for a royal icing consistency where it flows slowly off a spoon and barely holds a peak. If it’s too thick, add a few drops of water; too thin? Add a bit of powdered sugar. Remember, patience is essential here! There are many fantastic tutorials online, like this one from Joy of Baking, that can help you master the art of icing.
Ideas for enhancing the flavor
While the visual appeal of ghost cookies is essential, don’t forget about taste! You can enhance their flavor by mixing in different extracts, such as vanilla or almond, into your dough. For a seasonal twist, consider adding a pinch of cinnamon or nutmeg. You can even use flavored extracts, like orange or peppermint, for a unique taste that will set your ghost cookies apart from the crowd.
Happy baking, and may your creations be spooktacular!
Serving suggestions for Ghost Cookies
Perfect pairings for your cookies
When it comes to enjoying your ghost cookies, consider pairing them with warm beverages like hot chocolate or spiced apple cider. The sweetness of the cookies complements the rich flavors of these drinks beautifully. Alternatively, a scoop of vanilla ice cream can provide a delightful contrast – the creamy texture perfectly balances the crunchy, sugary exterior of your spooky treats.
You might also think about making a small cheese platter. Soft cheeses like Brie or goat cheese, along with fruit preserves, work incredibly well as a contrast to the sweetness of ghost cookies. For more inspiration, check out this cheese guide from the Dairy Farmers.
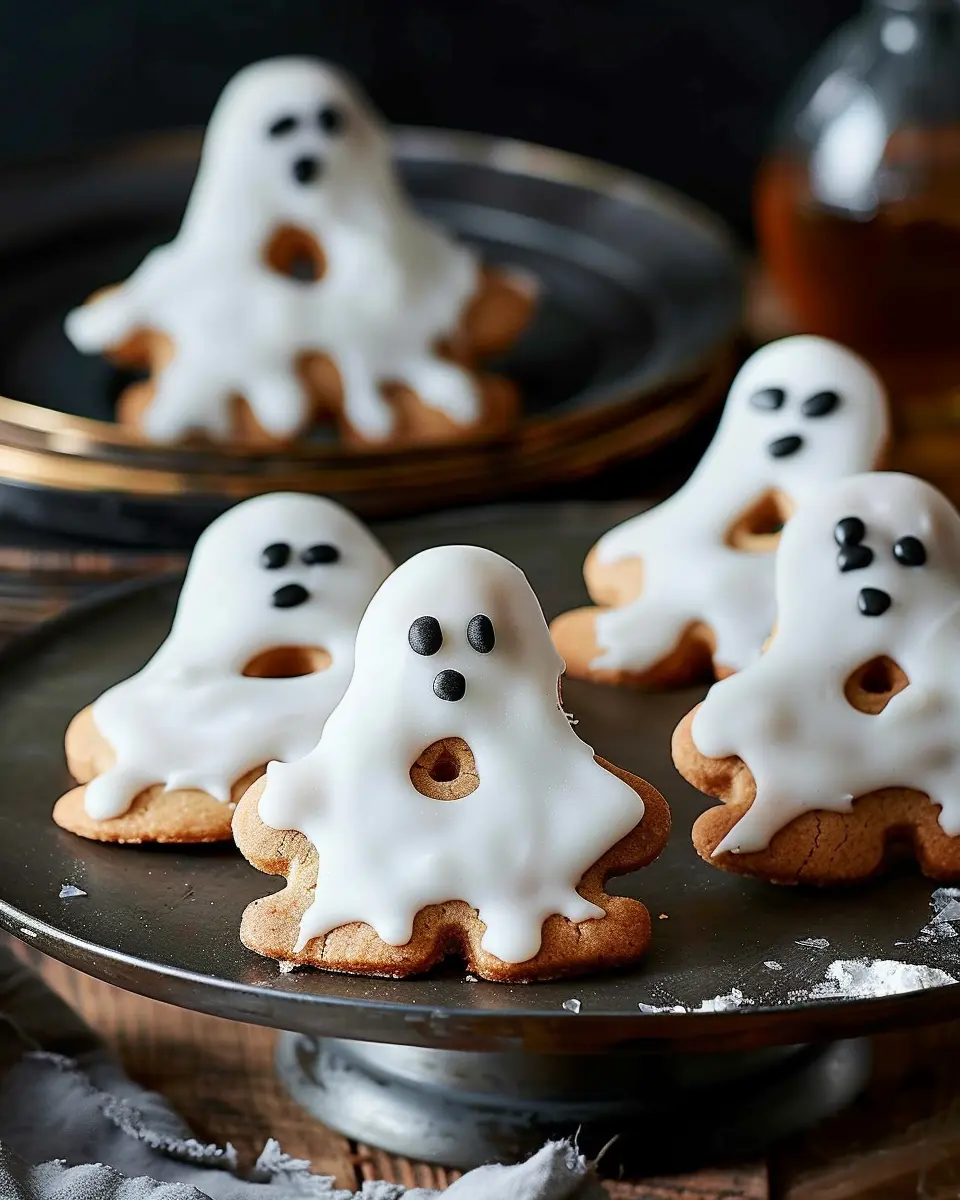
How to present them at a party
Presentation is key when showcasing your ghost cookies at a gathering. Consider placing them on a vibrant platter decorated with Halloween-themed props, such as faux cobwebs or tiny pumpkins. Arrange the cookies in a playful, overlapping pattern, which will draw the eye and make them the star of the dessert table. For a fun twist, consider packaging individual ghost cookies in clear bags tied with orange ribbons. This adds a personal touch and makes them perfect take-home treats for your guests!
Time breakdown for Ghost Cookies
Preparation time
Making your ghost cookies starts with some simple prep work. You’ll need about 15 minutes to gather your ingredients. This includes measuring out flour, sugar, and those essential spooky decorations!
Assembly time
Once you’ve prepped your ingredients, it’s time to mix and form those adorable ghost shapes. This will take around 30 minutes, especially if you’re having fun getting creative with the decorations. Feel free to engage friends or family in this step for a spirited baking session!
Total time
All in all, expect the entire process for your delightful ghost cookies to take roughly 45 minutes. Perfect for a quick Halloween treat or a fun weekend project! Want some tips on making the best cookies? Check out this baking guide, which covers everything from choosing the right ingredients to storing your baked treats effectively. Happy baking!
Nutritional facts for Ghost Cookies
Calories per cookie
When it comes to enjoying a festive treat like ghost cookies, keeping an eye on the calories can be helpful. On average, each of these whimsical delights contains around 100 calories. While they are an indulgent bite, moderation is key. Consider pairing your cookie with a cup of herbal tea for a cozy snack that balances sweetness and warmth.
Ingredients breakdown
The magic of ghost cookies lies in their simple yet delightful ingredients:
- Flour: Provides structure and texture.
- Sugar: Sweetness factor, and you can use alternatives like coconut sugar for a healthier option.
- Butter: Adds richness and flavor. Consider swapping with a plant-based option if desired.
- Eggs: Important for binding and moisture; flaxseed can be a great egg substitute if you’re looking for a vegan option.
- Vanilla extract: Crank up that flavor profile!
- Chocolate chips: The perfect gooey addition. Enjoy dark chocolate to up the antioxidant factor.
Each of these components plays a crucial role in creating those irresistible ghost cookies you love. Not only are they delightful, but they also offer room for healthy tweaks. For more insights into baking chemistry and ingredient modifications, consider checking out guides from the Baking Science Institute. With a little creativity, you can enjoy these treats guilt-free!
FAQs about Ghost Cookies
Can I use different types of cookies?
Absolutely! While this recipe shines with classic sugar cookies, feel free to experiment with various types. Gingerbread cookies, for instance, can add a warm spice that complements the festive theme beautifully. If you’re looking for something chocolatey, chocolate chip cookies can also work—just be aware that the ghost decorations might stand out a bit less against the dark base. Have fun mixing and matching your favorites!
How to store leftover cookies?
If you find yourself with leftovers—lucky you! Proper storage is key to keeping your ghost cookies fresh. Store them in an airtight container at room temperature for up to a week. For longer storage, consider freezing them. Just lay the cookies in a single layer on a baking sheet, freeze until solid, then transfer them to a zip-top bag. They should keep well for up to three months. When you’re ready to enjoy them, simply thaw them at room temperature; they’ll taste just as good as the day you made them.
What other decorations can I try?
When it comes to creativity, the sky’s the limit! Though we love the classic ghost design, there are numerous ways to jazz up your ghost cookies:
- Sprinkles: Try adding colorful sprinkles for a festive touch.
- Colored Icing: Use different food coloring to make a fun, vibrant assortment of spooky cookies.
- Edible Glitter: A little shimmer can make them extra magical—perfect for holiday gatherings or parties.
For even more ideas, check out sites like Food Network or Martha Stewart for inspiration. Play around with these variations and make the best of your cookie-baking experience!
Conclusion on Ghost Cookies
Recap of the joy of homemade treats
Making ghost cookies is not just about the delightful flavors; it’s about the experience of creating something special. Whether you’re baking for a Halloween gathering or just enjoying a cozy evening at home, these cookies can bring smiles and laughter to any occasion. There’s something magical about mixing ingredients, shaping them into spooky forms, and watching them come to life in the oven.
When you craft your own treats, you have control over the ingredients, allowing for healthier options, like using whole wheat flour or organic sugar. Plus, your friends and family will always appreciate the effort you put into homemade goodies. So grab your spatula, and let’s spread the joy of baking—one ghost cookie at a time! If you’re looking for more ways to get creative in the kitchen, check out this guide on cookie decorating techniques.
PrintGhost cookies: Easy Halloween Treats for Your Home-Baked Fun
Ghost cookies are a fun and easy Halloween treat that your whole family will love!
- Prep Time: 20 minutes
- Cook Time: 12 minutes
- Total Time: 32 minutes
- Yield: 24 cookies 1x
- Category: Dessert
- Method: Baking
- Cuisine: American
Ingredients
- 1 cup butter, softened
- 1 cup granulated sugar
- 1 cup brown sugar, packed
- 2 large eggs
- 3 cups all-purpose flour
- 1 teaspoon baking soda
- 1/2 teaspoon salt
- 1 teaspoon vanilla extract
- 1 cup white chocolate chips
- 1 pack edible black decorating gel
Instructions
- Preheat the oven to 350°F (175°C).
- In a large bowl, cream together the butter, granulated sugar, and brown sugar until smooth.
- Beat in the eggs one at a time, then stir in the vanilla.
- Combine the flour, baking soda, and salt; gradually blend into the creamed mixture.
- Stir in white chocolate chips.
- Drop by rounded spoonfuls onto ungreased cookie sheets.
- Bake for 10-12 minutes in the preheated oven until edges are golden.
- Cool on wire racks before decorating with the black gel to create ghost faces.
Notes
- For a more festive touch, use different types of chocolate for the eyes.
- Ensure cookies are completely cool before adding decorations to prevent melting.
Nutrition
- Serving Size: 1 cookie
- Calories: 150
- Sugar: 10 grams
- Sodium: 200 milligrams
- Fat: 8 grams
- Saturated Fat: 4 grams
- Unsaturated Fat: 3 grams
- Trans Fat: 0 grams
- Carbohydrates: 18 grams
- Fiber: 1 gram
- Protein: 2 grams
- Cholesterol: 30 milligrams
Keywords: Ghost cookies